BSG Colonial Viewmaster

Because the ridiculous explosion of the Cylon Raider diorama alone wasn’t enough scope creep, I threw a related side project in the mix. First some context.
I love love love seeing construction photos of models sitting on a show table. Especially the diorama work. It’s great to see how complex final products came together over time. But the only way I’ve seen this done at shows to date is with 1980s style photo books. So often, too often the pictures aren’t great, the printing of them makes them even worse. I wanted to do something different to show off the insane amount of work done on the Cylon Raider diorama when it’s sitting on the show table. I played with ideas of QR codes linking to a specific photo gallery (which I still may do) but I happen to have a viewmaster bouncing around my hobby room and had a flash of inspiration: Maybe I could rework this toy, like so many movie prop makers over the years have done, to fit into the world of Battlestar Galactica. Years back my kid had gifted me a Viewmaster and free custom reel from Image3D. I’d never used it but never lost the free code. It was finally time to use it.
Prepping the Viewmaster
I started by cracking open the case (it’s two main outer parts) and pulling apart the interior pieces. This was important because I wanted to repaint the round “advancer” and I also wanted to scrub away the sparkly paint off the exterior. I wanted to make sure to tape off the lenses inside and out to protect them. I also wanted to remove the paper design that’s in front of the front “window” so I could replace it with something cooler.
Cracking open the case was tough. It is mainly fastened with friction joins but …maybe some glue too? I dinged up the edges a bit, but I don’t care… it’s a movie prop… that’s how things come together in movie shops. And nobody will probably notice anyway.


Sanding off the raised branding
There was a weird “3D” raised logo on the rear of the viewmaster. That had to get scraped off and sanded out. I also had to sand out a few other imperfections. Prime, sand, prime again.


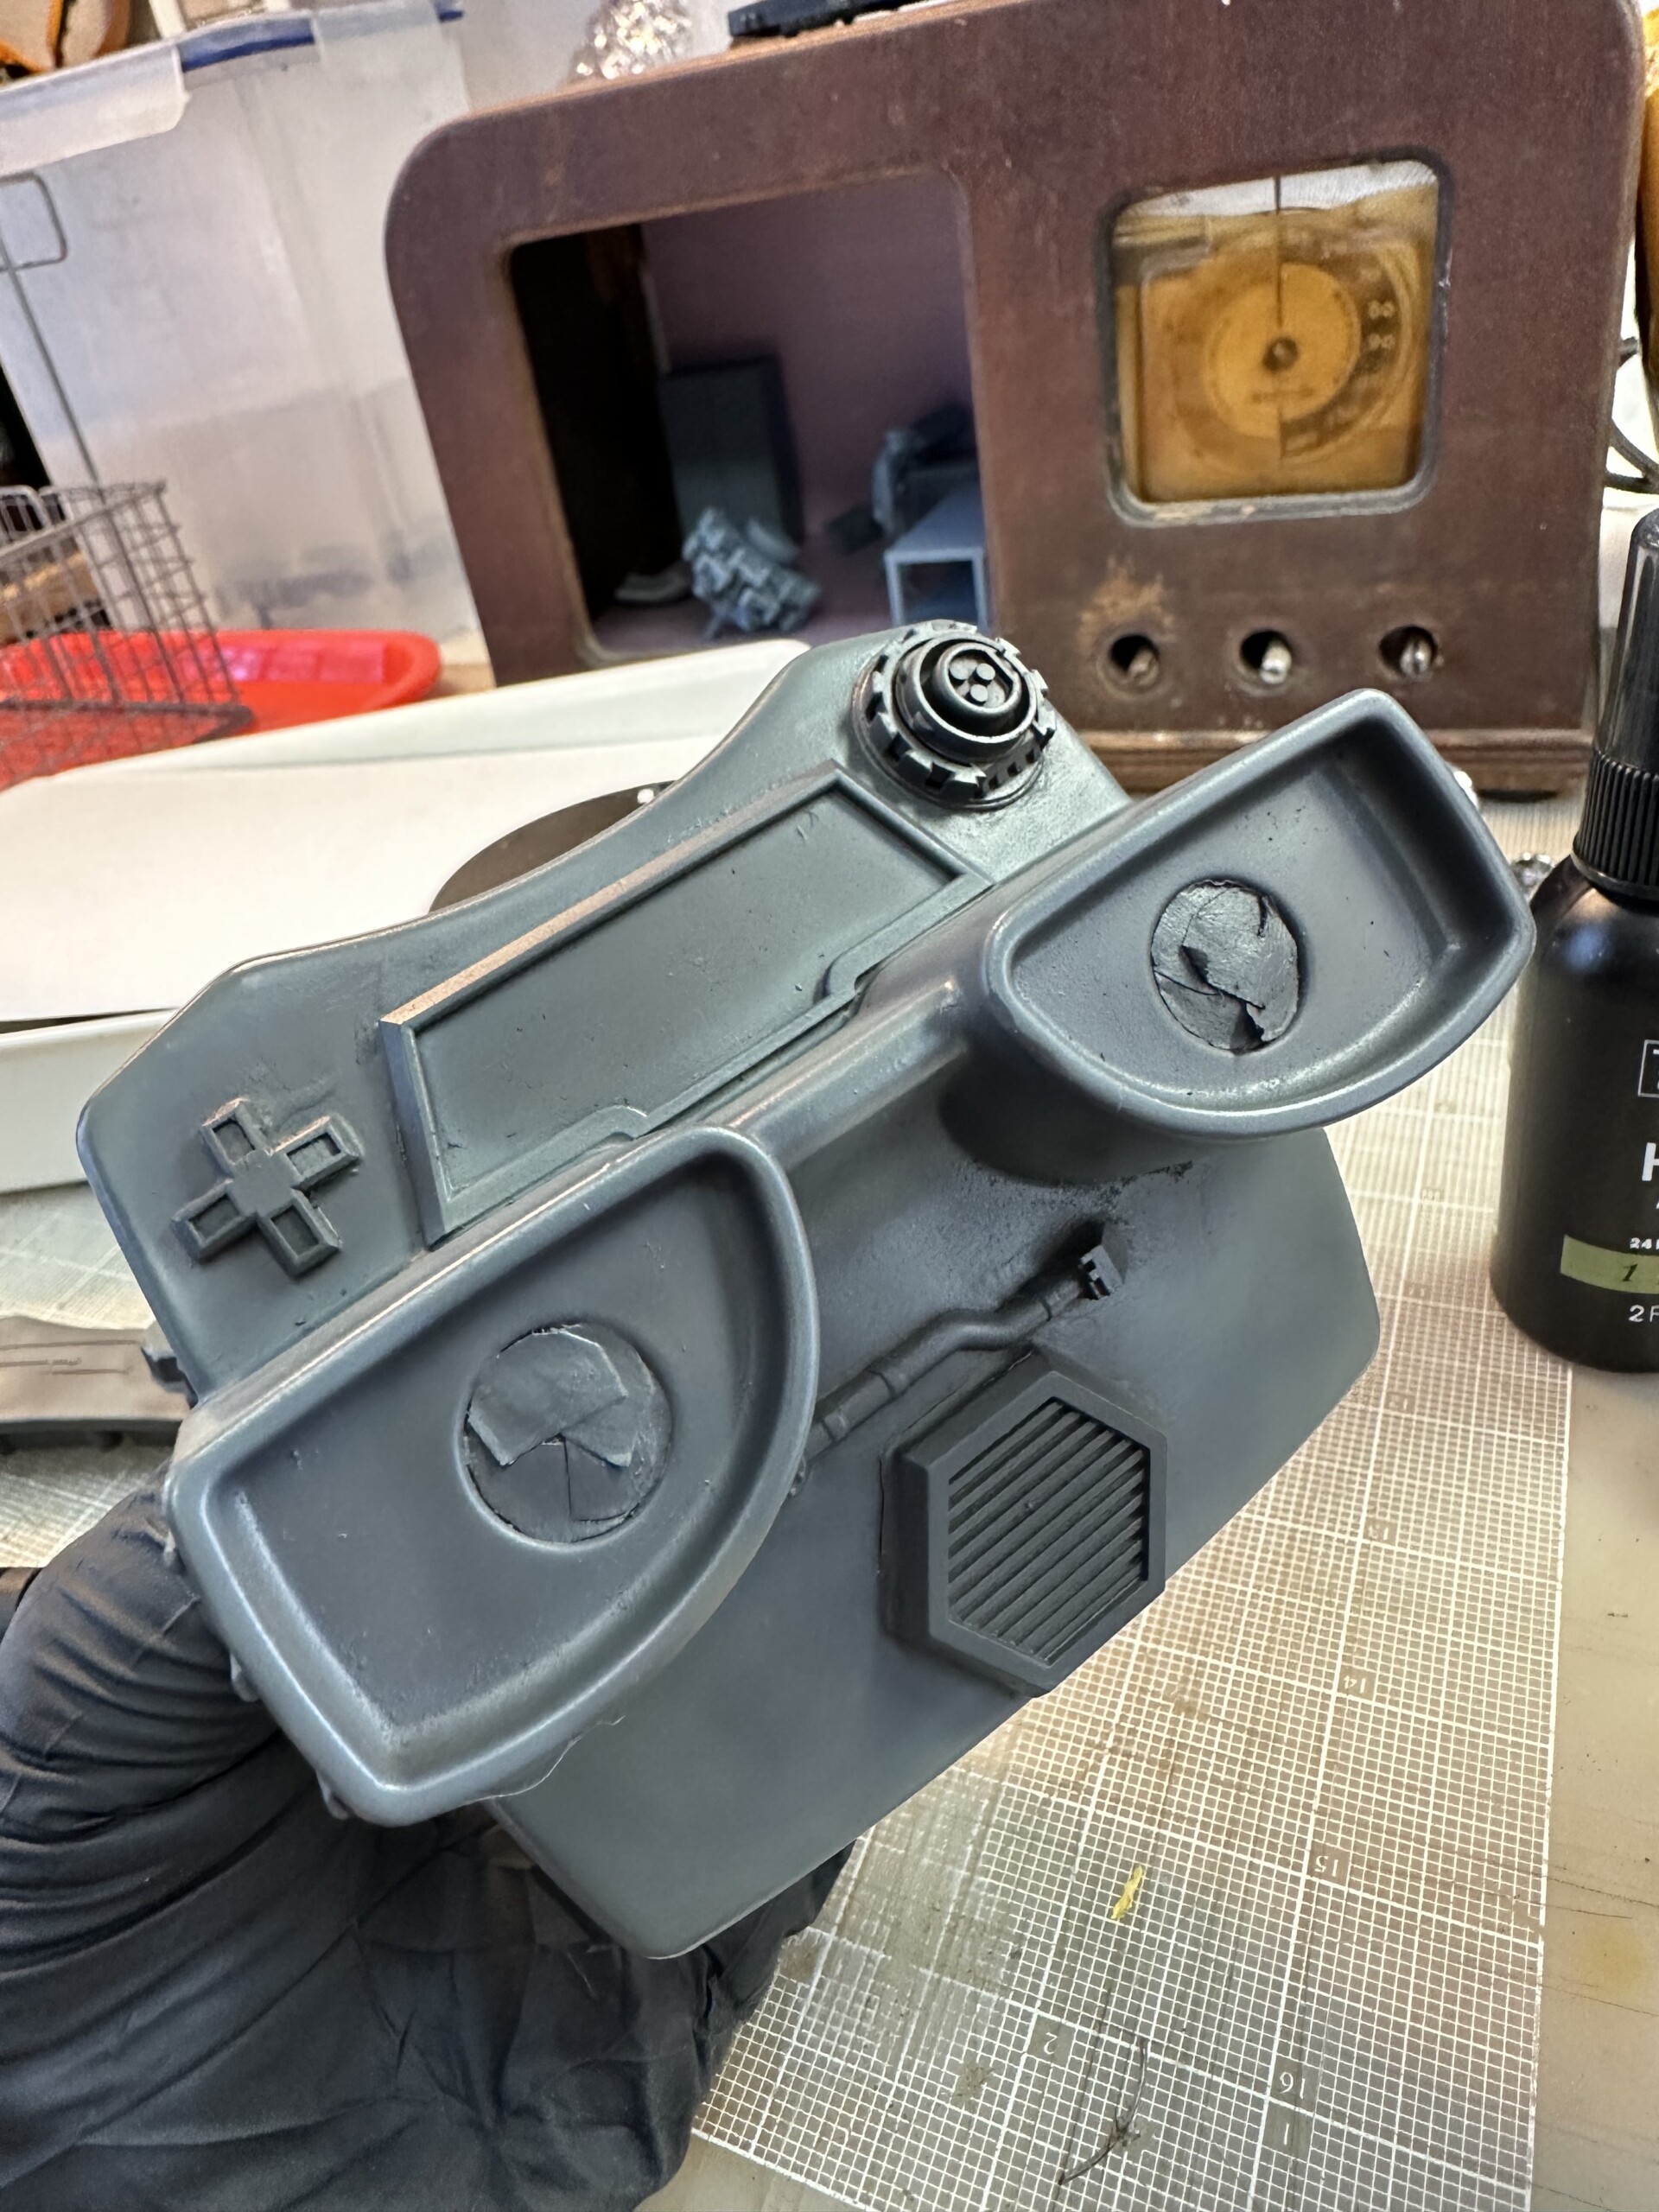
Attaching the greebles
After some time on Thangs and Cults3D, I found a handful of tasty greebles. I printed out a bunch of them and then just started fitting them in where they made sense. I moved and moved them around over the course of a few days to see what felt right.
I also used some sheet styrene to add the “line” pattern on the top left front. Nice little extra touch.


Time to prime & basecoat
A final coat of primer to show how many imperfections existed in how I had attached the greebles. I fixed as much as my fucks would allow. The ones that remain are explained as purposeful, since movie props are often imperfect. Yeah, that’s exactly why I left the blemishes in place. Yep.


Rust coat and chipping
To prepare for the hairspray chipping, I put down a base coat of rusty tones. In retrospect, a single tone would have worked better in this context, since the multiple colors seemed odd at this size when the chipping revealed them.


I applied dark and light gray tones in a cloud pattern to make it feel like it’s a worn out device used for years.

Getting there…
Chipping done and some sponged on tones and I’m nearly done with the paint.


Final product
After a lot of adjustment of tones, additional weathering and a bunch of semi-matte GX clear coat, I was done. A perfect(ish) Colonial Spec Reader (whatever the hell that means)
 ‘
‘One of my favorite details, that for me at least, really helps create the illusion of this being a “real” tool was the information plate on the back. This was simple to make: I design a basic layout (fonts and gray boxes on a black background), printed it out, coated it in Mod Podge, and then glued it on with white glue after the Mod Podge had dried. Great vibe.

Creating the reels

