WWI Trench Diorama: “Pack it up, we’re going home”

This diorama started years ago… sorta. I found a nice wooden diorama base at IKEA, improperly marked as “serving tray”. I hung onto this dumb thing for years, knowing one day I’d use it for a round diorama. After I finished the Barn diorama in early 2023, I was itching to do more work with insulation foam. So I grabbed an older, completed model of a WWI British Mk. IV tank and decided to make a trench base for it. Not sure where this idea came from, it just kinda fell out of my head.
This project was fun and I learned a lot of new things. Nothing was particularly tough and I started and finished (!!) it in a matter of a few months. Here’s the low down of how this project went.
Carving the foam
I wanted this project to be tall. Given the diameter of the base, the trench, and the desire to have the groundwork slope away from the trench (as if the excavated dirt from the trench created it), I used two pieces of insulation foam to start. I cut out of a round piece of cardboard then used that to guide the Proxxon hot wire cutter table (an amazing tool in the arsenal) to cut two pieces of stacked foam into the core shape. I knew I would wrap the foam with wood veneer so it didn’t have to be absolutely perfectly smooth and round. In retrospect, I wish I’d made it a bit more smooth and accurate. Part of the roughness came from the fact that I used the wrong cardboard (from an amazon box rather than thick cardstock style material). More on this later.

This was one of those projects where I wasn’t 100% clear what I was making until I started making it. And even then I did a fair amount of modifications until I got something liked. For me, visualizing how the trench would run couldn’t happen in the abstract. I had to start cutting foam. And cut I did…
I started out thinking the trench would be straight. BUt it just didn’t look right. It looked waaaay too symmetrical. So I added a bend to give it some visual appeal. You will notice in the photos that I wasn’t trying to cut out a single piece of foam to create the trench. Instead, I cut off half of the top main round piece and then started adding various angled and filler pieces to get the shape I wanted in the end. Since the foam was going to be 100% covered by other materials this approach was perfectly fine. I just needed to make sure everything was glued properly. The hardest part of this process was getting the visual depths right and the angles cut properly. Lots of small pieces were lost in this process as I screwed up the angle math.


I was rewinding (and rewinding and rewinding….) the movie “1917” to get inspiration for the trenches. One thing I really liked was the “rooms” carved into the side of the trench walls. So of course I had to add one. So I cut it out. Again, without much of a plan, so there were… alterations later”.

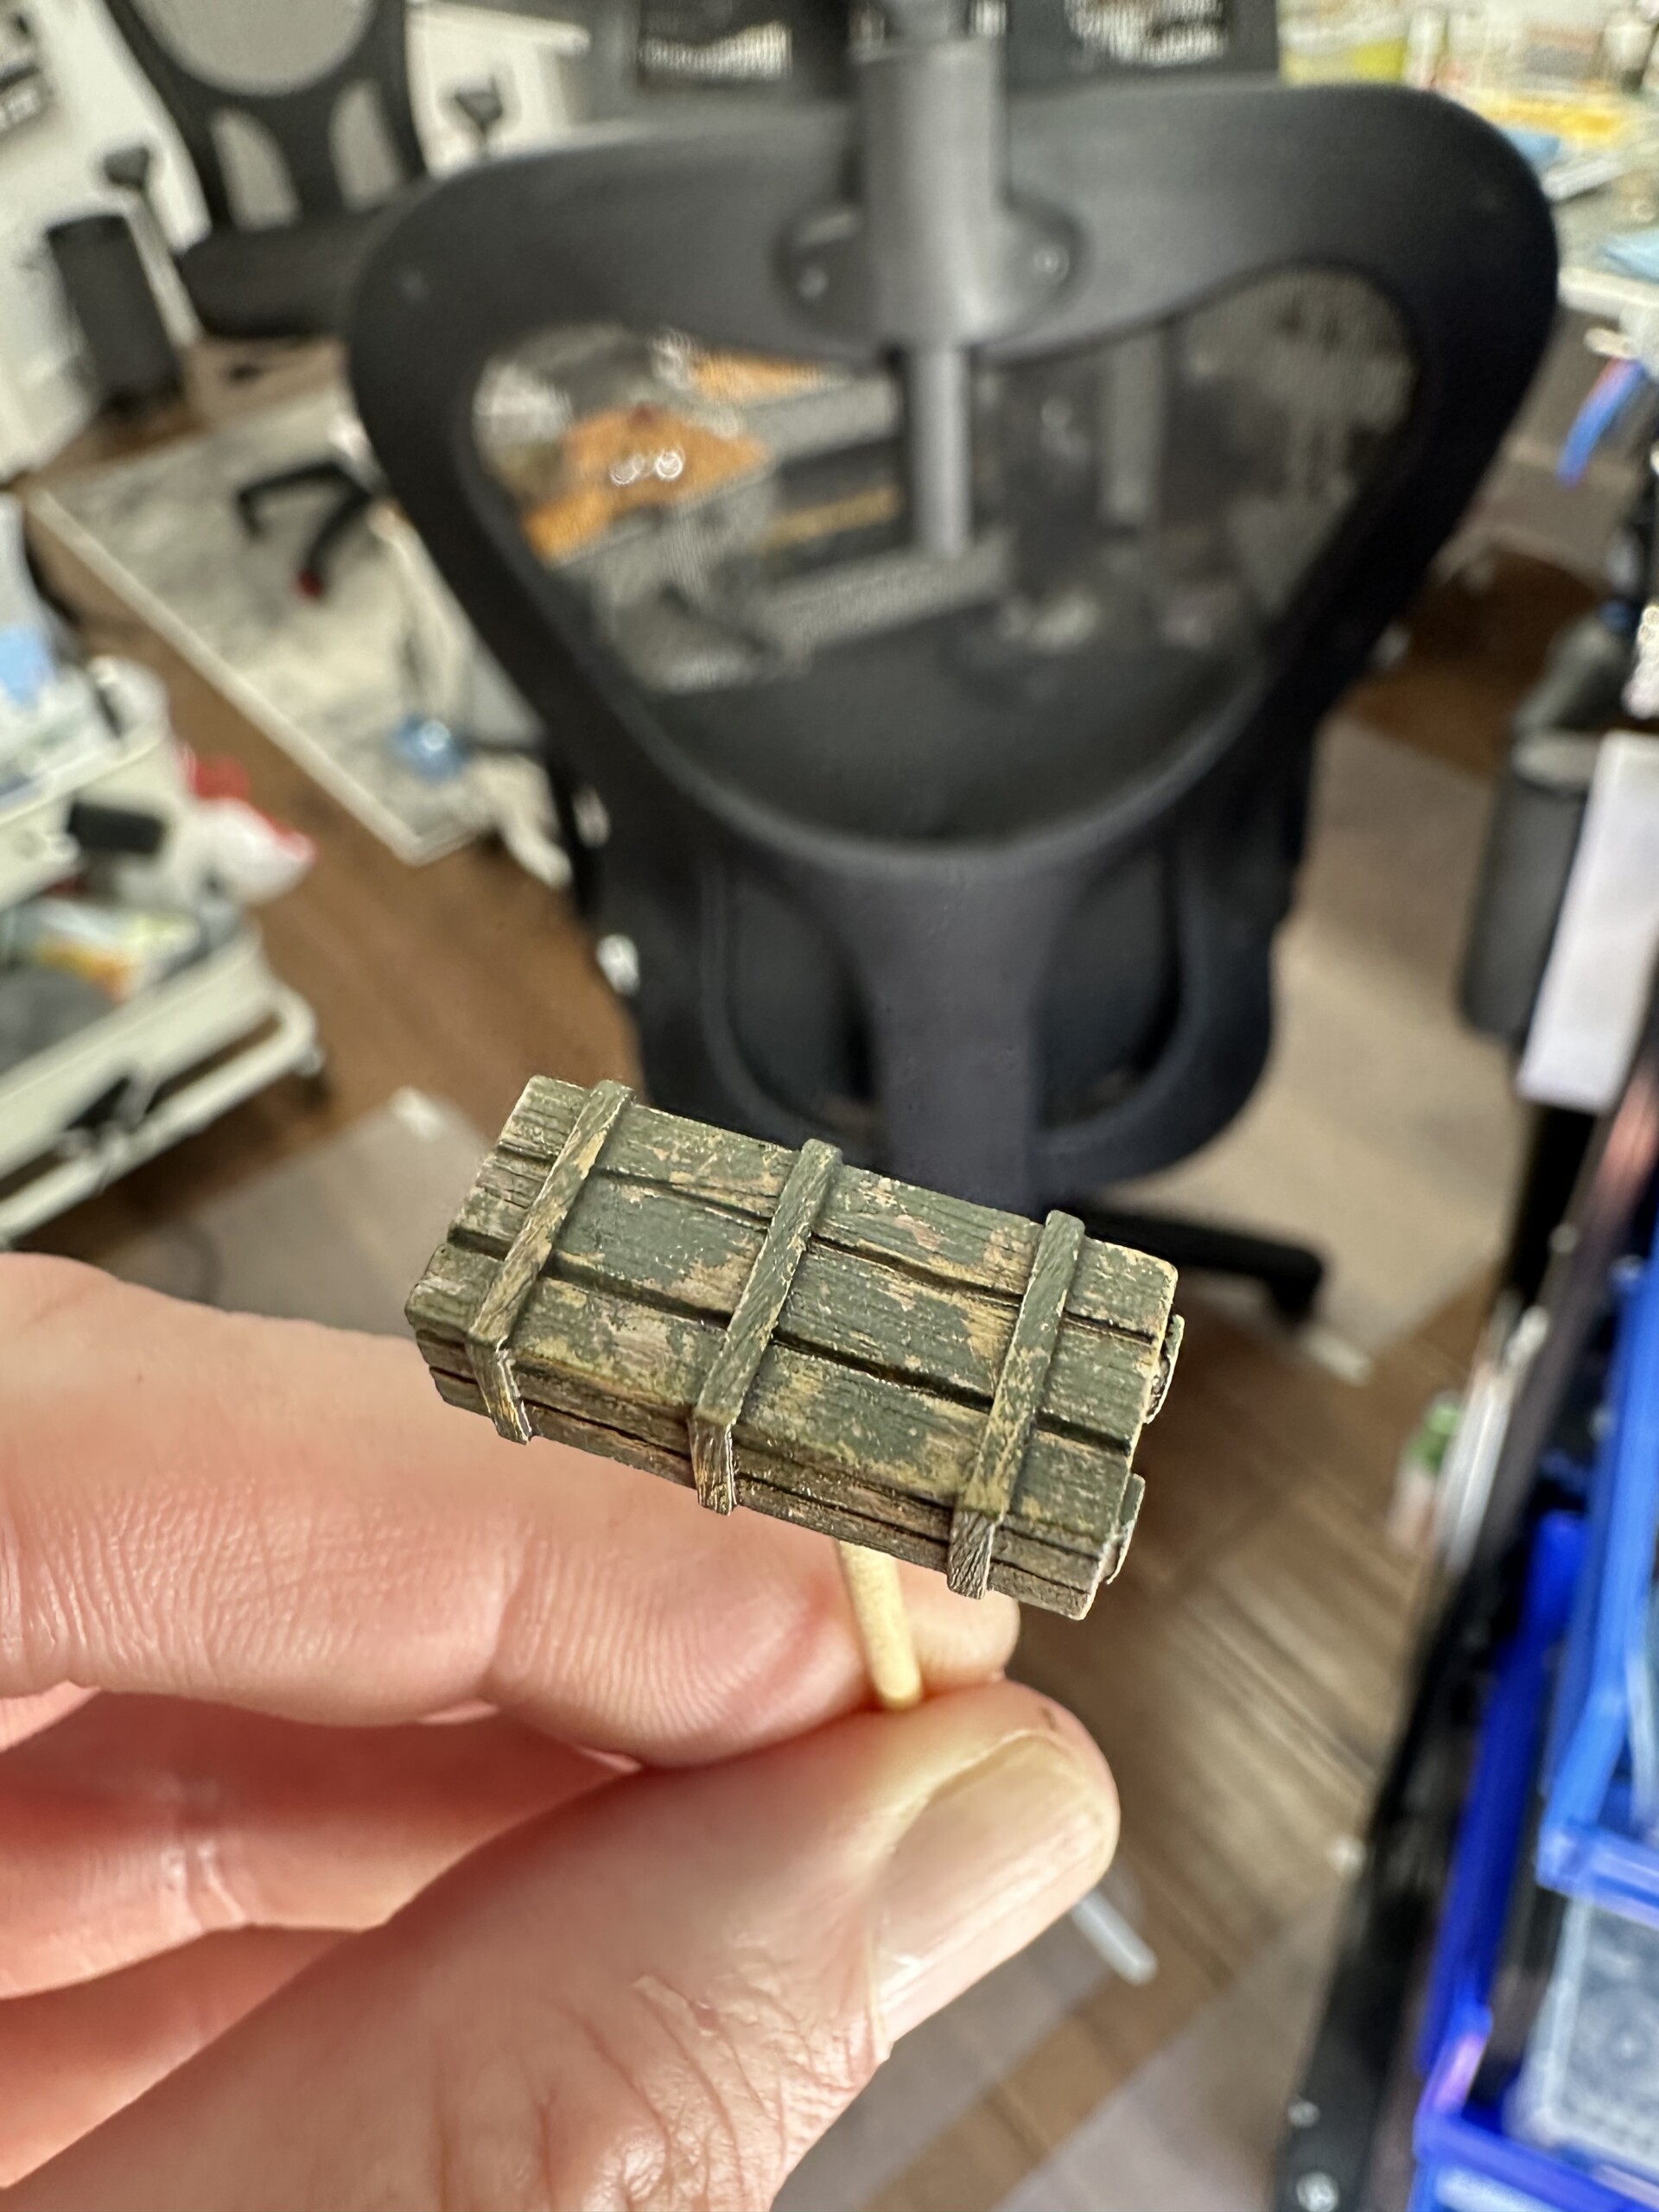
Sandbags
Once I had the foam shaped and glued down, the next step was to build a bunch of sandbags. I wanted them in place before I spent time on much else. Plus, I knew I’d be sculpting for a while and I wanted to do that at the start of the project when enthusiasm was high. I used FIMO oven bake clay to sculpt them. I would absolutely not use this again for this task. The FIMO was great to work with and baked to a rock hard finish. But since I was sculpting on the foam and then remove them, even in sections, to then bake, the final sculpted shape never quite matched the post-bake shape. Next time I’ll use A+B epoxy putty.
The other challenge with the sculpting was keeping the basic shape right. I used a small two-walled jig to get the right basic shape/size of the sandbag and then worked it with my fingers to get it to the final shape. I used baby powered liberally to keep the clay from sticking to the plastic. Then I would use a dental tool to draw in a seam line or a pair of tweezers to pinch a seam showing the bag turned inside out. Both were used in the trenches. I also sculpted a bunch of thin “tied off” closure of the bags on the top layer where the bags would have been tied off.
I started over 4 times… and I’m still not 100% happy with the sandbags. But live and learn for next time.


I also inserted a “view box” (or whatever it’s called, where the soldiers put wooden boxes they threw together in the sandbags to they could peer out without getting their heads shot off.

The last phase of the foam work was to create more texture and some shell craters. I started off with a heat gun to make these. When you heat up the insulation foam, it melts and kinda “sinks”, creating a great shell crater effect. Start slow, keep your head gun or torch really far away and move in slowly. Remember that the heat will do nothing until it’s doing EVERYTHING FAST. Practice a lot on some scrap pieces.
This technique looks great…when done right.
NOTE: It’s really important to remember that this insulation foam comes with a very thin plastic coating. Use your wire cutter table to shave off a millimeter of the foam if you’re going to use this technique. Otherwise the plastic melts and creates a bunch of funky “pockets” instead of night smooth melted foam. Since I was covering this in VMS Smart Mud, I wasn’t particularly concerned, but it could have been a real problem.

Wood trench walls
Using my handy Cricut cutter, I cut out a ton of veneer planks. These looked great and I started on the bottom of the step up ledge first. These planks were affixed with AK’s Wolverine PVA. I like this stuff because it dries quick. Although I’m moving more and more to using Aleene’s Tacky Glue.


For some reason I thought I’d use a thicker wood (coffee stir sticks) on the front wall… but it just looked really thick and out of scale. So I ripped it out and replaced with the same Cricut cut wood veneer. On all the walls, I used real twigs for the upright supports. All planks were glued in place in a wonky kinda way… trying to show some level of haphazardness.
I didn’t put any groundwork behind the planks, thinking I’d do this after installing the planks as part of the overall ground work application. This was a mistake. It would have been a lot easier and made the walls look better if I’d put down wet groundwork material and then embedded the planks in that.


Corrugated tin on the back wall
This is probably my favorite part of the whole diorama: the corrugated tin panels. They are made simply: I 3D printed a jig from REMJ and pressed sheets of Verlinden lead foil to shape. Easy breezy. But dang they turned out good.

I also built up a “doorway” for the trench room. I wasn’t detailing the room at all, so I just hacked out a recess to paint black. I put a blackout curtain in place later to block the view of this recess/room. In retrospect, trying to put it in at the end instead of at this step was a huge, annoying mistake!
(You can also see the corrugated tin “roof” here. It’s bent up because it kept getting bent around. Every. Damn. Time. I looked at it. Next time, I build a frame under it.

Wooden walkways
The next step was to construct the wooden walkways. These were pretty straightforward. I had to cut some of the planks out to fit around the log wall supports. I worked in multiple sections since it would have been unlikely to have to seen one massively long section. One section was pushed into the ground work.


Groundwork
Next came the ground work… the step up firing ledge was originally laid out with Mig Ammo Dry Earth. I’m not much of a fan of this stuff… far too rubbery. I might have other applications for it, but this didn’t work great for me. The rest of the diorama was covered in one of the most amazing modeling products I’ve found to date: VMS Smart Mud 2.0. Thanks to Uncle Nightshift for this recommendation. He’s not kidding about how good it is. It lays down easily, spreads easily, and dries rock hard with a wonderful texture. A few tips tho:
- This stuff has a hard time sticking to the foam at first. I rubbed a first layer of the stuff super super thin, just to get some of the material to stick. I largely used a finger to get it down…which seemed to work better than a spatula, but you can use that too.
- Try to work the texture while it’s still wet and workable because if you don’t, you’ll need to coat it with a layer of white glue and sand. You’re likely going to want to do this anyway just to add some additional/better final ground texture, but whether you end up doing some minor touch up or major coverage is going to depend on how well you shape the Smart Mud.
- Don’t feel like you have to do this all in one setting. One of the best things about this miracle elixir is that you can continue to add and work in additional applications without concern. I put down the groundwork, added the veneer sides, then came back and filled in the edges.
- It doesn’t come out of the jar “wet”, so don’t worry if it looks like it’s dried out.
Highly recommended!
I also pressed some tank tracks into the wet groundwork, as well as the tank itself. (I later added more Smart Mud up against the tracks after the vehicle had been affixed to the base)


Wood veneer side/wrap
Time to wrap the ugly foam edges with a beautiful wood veneer. In the past I’ve used wood glue/white glue to glue down the veneers but they’ve been too “wet”. (I blogged about this over here) I’ve since discovered Aleene’s Tacky Glue and would use that instead. Uncle Nightshift has talked about using double sided tape to adhere his veneers. So for this diorama I decided I’d skip the middle man of double sided tape, so to speak, and just buy veneer that came with the double sided tape already on the veneer. Bad idea. It was pretty sticky and seems to have adhered in a pretty solid, long-term viable kinda way. But there was a problem that drove me nuts…
When I put the veneer in place, I cut a straight light for the bottom that tucked into the base. But I left plenty of extra at the top so I could cut/sand it down to really fit the contours of the base. But as you can see in this first photo below, the double sided tape was exposed since it covered the entire veneer. If I’d be thinking ahead, I would have first cut away this adhesive before I put the veneer in place. Since I didn’t, sanding and cutting created a ton of “glue goo” bits that I kept having to pull off and manage. It was a huge pain in the ass. Next time I’ll likely just use a roll of foam double sided tape instead.


One other problem for putting the veneer down was the exacting symmetry of the base itself. This was a perfectly round wood base that I would putting this veneer wrapped foam base into. I hadn’t done a super great job of cutting an exact round foam stack. I had a bit of challenging trying to get the veneer wrapped around the foam, adhered, AND having it shove out to the edges of the wood base so there weren’t unseemly gaps between the veneer and the round wood base. I had to end up sticking a number of foam shims in to shove it out. (See the upper middle part of the base in the photo below)

The shims worked fine and mostly shoved the veneer around where I needed it to be. I had to end up using some wood filler in a few spots to get rid of small gaps. This was an important effort because the base is so tall that imperfections would shout out “poor craftsmanship!” in a big loud voice. Speaking of poor craftsmanship…
Wood veneer problem!
As you can see in the picture below with the tape, for weird reasons the edges didn’t meet up right when I taped the veneer down. Partially from my own boneheadedness when I cut the extra length down after everything was in place, partially from the way the foam happened to be shaped right behind the seam (there was too many shims there because I’d opted to push the non-shimmed area to the front of the diorama to make sure the trench cut outs were the priority)

I tried glue. I tried more tape. I even tried pinning+gluing. Nothing seemed to get thing damn edge in place like I needed it to be. I knew I’d be filling some gaps, but after a few rounds with basic wood filler, which kept popping off, I knew I’d be needing some industrial strength solution. Not just to smooth out the edges, but to create some “lock in” effect. Again, I needed this edging to look near perfection or it would scream out its imperfections. So out came the Bondo for Wood. This stuff is goddamn amazing…even if it stinks so bad I couldn’t use it in my hobby room. Or garage. Or within close proximity to the house. It’s a two part mix that dries in a few minutes, ready to sand, and then sands like a miracle. It’s amazing. As you can see, I Bondo-ed, sanded, primed, then repeated multiple times before the seam disappeared the overall shape was “perfect round”. The base was ready to prime. And I was ready for a stiff drink.


Once the base was done, I applied a layer of diluted white glue (using alcohol to break the surface tension first), added a couple sticks from the backyard, snapped off, and some tiny and more tiny rocks into the groundwork. The dirt was from my backyard and three levels of sifted: Not at all (dirt chunks and clods), medium sift (bigger texture dirt), and fine sifted (sand-like consistency).

Base coating the entire base
In a recent Nightshift video (can you tell I am a big fan?) about his WWI trench diorama, I learned that he base coated the entire base in black. A common technique for him that helps the colors be deeper, more muted. I wanted to do the same to get the same effect. I don’t know that I’ll do this again… but more on that below. In the meantime, I used the Mr. Hobby Aqueous Black Surfacer 1000 in the spray can. It sprayed well and didn’t eat at the foam since it’s water based. Highly recommended as a paint, if not as a technique. (Nightshift has since stopped doing this, from what I understand)


(look how clean that workbench is… this won’t last long…)
Painting the base
After about 3,453,238 hours of woodworking cleanup, the base was primed and ready to move to paint. First, I wrapped the base in tape with the hopes that I wouldn’t have to repaint the wood base+veneer later. Surprisingly, that worked out!
The first step was to airbrush several brown and buff Tamiya colors onto the dirt areas. This was fairly haphazard and random. No need to be precise at this point. I’m just getting some basic variations sketched out. But also, with the texture that had been created, the haphazard felt great. I went back in and picked out various rocks/dirt chunks with the airbrush. My eyes were having a really hard time processing whether I was getting the coloring right or not and I realized it was because it was just too much brown. So I laid down an ugly coat of Khaki on the sandbags to have something to offset the browns. This really helped.


I also made sure to bring the tank I was using into the diorama just to see how things were blending.

Next came the brush work. I started laying down dark, almost black tones, brown washes (enamel AK washes, the Smart Mud is hard enough to protect the foam), and touching up rocks and clots with lighter tones. The black really helped make this look like ground that has been blown to hell by artillery, not just recently tilled farm land. I keep adding more and more to get the effect right since I started off really gun shy.

In doing some research about the trench accessories, I was watching “1917”. I noticed how damn orange the soil was. Like REALLY orange. So I eventually came back in with the airbrush and laid down quite a bit of orange tones too. This helped make the ground look more compelling.
Adding organics to the groundwork
As mentioned above, the tree stumps (one large and two small) were twigs and branches I’d grabbed from my backyard after the post-ice storm tree guys had made me a very nice, very expensive pile of branches to source from. But I also added a number of small “roots” into the crater. Not sure why I put roots in quotes since these are literally roots from a large bush that the ice storm uprooted. They were a nice bit of extra detail to help sell the illusion of the ground being blown to bits.

Painting the corrugated tin
The painting process on this project was… irritating. As mentioned earlier, I painted the entire base black to start. For the tin panels, I then sprayed rust base coat with the airbrush. Then I started working to add the silver tones and rust tones. I absolutely hated the results…mainly because that Verlinden lead foil has such a perfect natural color. So I stripped the paint off with some AK Paint Stripper and added oxidation and rust markings. On one panel, I added some blue paint to help the “we swiped this from a local civilian building” look. I was vastly more satisfied with the results.


Sanding off the black primer
And funny story… when I started working on adding wood tones to the black primed real wood planks, I was equally unsatisfied. So first I tried to sand the black paint off. Then I tried to use the AK Paint Stripper. Then more sanding. Then sanding again with different tools. It removed much of the black primer but daaaayyyyummm was this stuff stuck on. Fortunately I was able to use this lingering black to help sell the “this trench is covered in grime” feel and layering on various wood tones turned out pretty good. Not perfect, but not terrible.


Painting the wood tones
As you can see below, I added a variety of wood tones to show that the wood had been grabbed from a number of sources.
I also painted the log uprights.


Mud, dirt, and water
Next up was the dirt/mud that needed to be put into the trench floor. I laid down quite a bit and covered a good portion of the wooden walkways, as references showed. The mud here was the Mig Ammo muddy ground (or something like that). It was OK… not as awesome as the Smart Mud to work with, but also better for this application. When it was drying, I sprinkled medium and fine sifted dirt over the trench floor. Once everything was dry, I came back in with some sand paper and a rounded scalpel blade and re-exposed some of the wood in places. I also touched up some paint to help highlight the wood.
(Sidenote: you can see the orange tones here better. Makes this base look at lot more realistic!)
I wasn’t trying to make this a “muddy trench diorama”, but wanted to show that there was always some amount of water standing in these nasty trenches. I filled in the shell craters and the dip in the wooden walkway with some “water” product. Can’t recall what now. It needed tinting and I over-tinted. When it dried, I was fortunately able to just pull it up with some tweezers. It came off in one big piece in all the places I laid it down. Minor groundwork touchup needed. I then switched to AK Puddles. This stuff is fantastic. I used it straight out of the box and was able to apply without creating many bubbles… the bubbles will break the illusion of reality immediately. Tips for applying AK Puddles:
- Don’t apply directly from the dropper bottle… too likely in my experience for that to create bubbles.
- Pour some into a cup, then use a brush to gently paint it on. You may have to work the liquid around a bit to get rid of bubbles. Go easy or you’ll create more.
- You can thin this stuff with water. I was adding a single drop of water to however much I poured out to work with. It seems like this was just enough to relax it and avoid bubbles without significantly changing the consistency or material handling.
- Once you have a thin layer down, leave it the hell alone. Let it dry. You can add more layers pretty easily, and more thin layers is better than one big thick layer that won’t dry.

Sandbags
It was time to paint the sandbags for real. This was all done with a brush and a lot of stippling. I’m not totally satisfied with the look (trying to recreate canvas), but hey, it’s not horrible either. Looks better in person than the photo shows.
(I touched the sandbags with some random strokes of AK Puddles in an attempt to bring the wet ground to the sandbags. It didn’t help with cohesiveness as much as it just looked like I missed some glossy spots. So I sprayed some AK Ultra Matte Finish (my go to dullcote) to knock it all back. Helped with the canvas look too.

Barbed wire
Now it was time to start adding accessories. First up was the barbed wire. Man this stuff takes forEVER to make decent amounts. I wanted a LOT more on the diorama but what I ended up with was hours of work on a declining scale of interest. The process was fairly simple:
- Twist two long strands together. I chucked it up in my hobby drill and held onto the other end while I rotated the drill at a slow speed. Once done, twist the ends to “lock” the winding.
- Take a single strand and wrapped it twice around the two winded strands, make a loop, come back down with another double twist, loop, then go up again… rinse, repeat until your full strand has a bunch of loops.
- Scootch the double twists to the right spacing (I found I could easily eyeball this pretty quickly), touch a drop of thin super glue on the double twist
- When you’ve done this for the entire strand, clip the wire loops off and you’re left with barbs. Make sure to clip consistent lengths.
- Paint!
- Drink. You’ve earned it, buddy.
I also realized that “floating” the strand on a simple jig really sped up my process. 1000% recommend the two screw jig for this work.
(I was surprised that when I was doing this work on a long airport layover that nobody stopped me for bomb making fears)

The jig:

The final (unpainted) result)

I also bent up some poles that were used to lay the barbed wire in the right place. The poles were just brass wire bent around a simple jig then painted black.
The phone lines
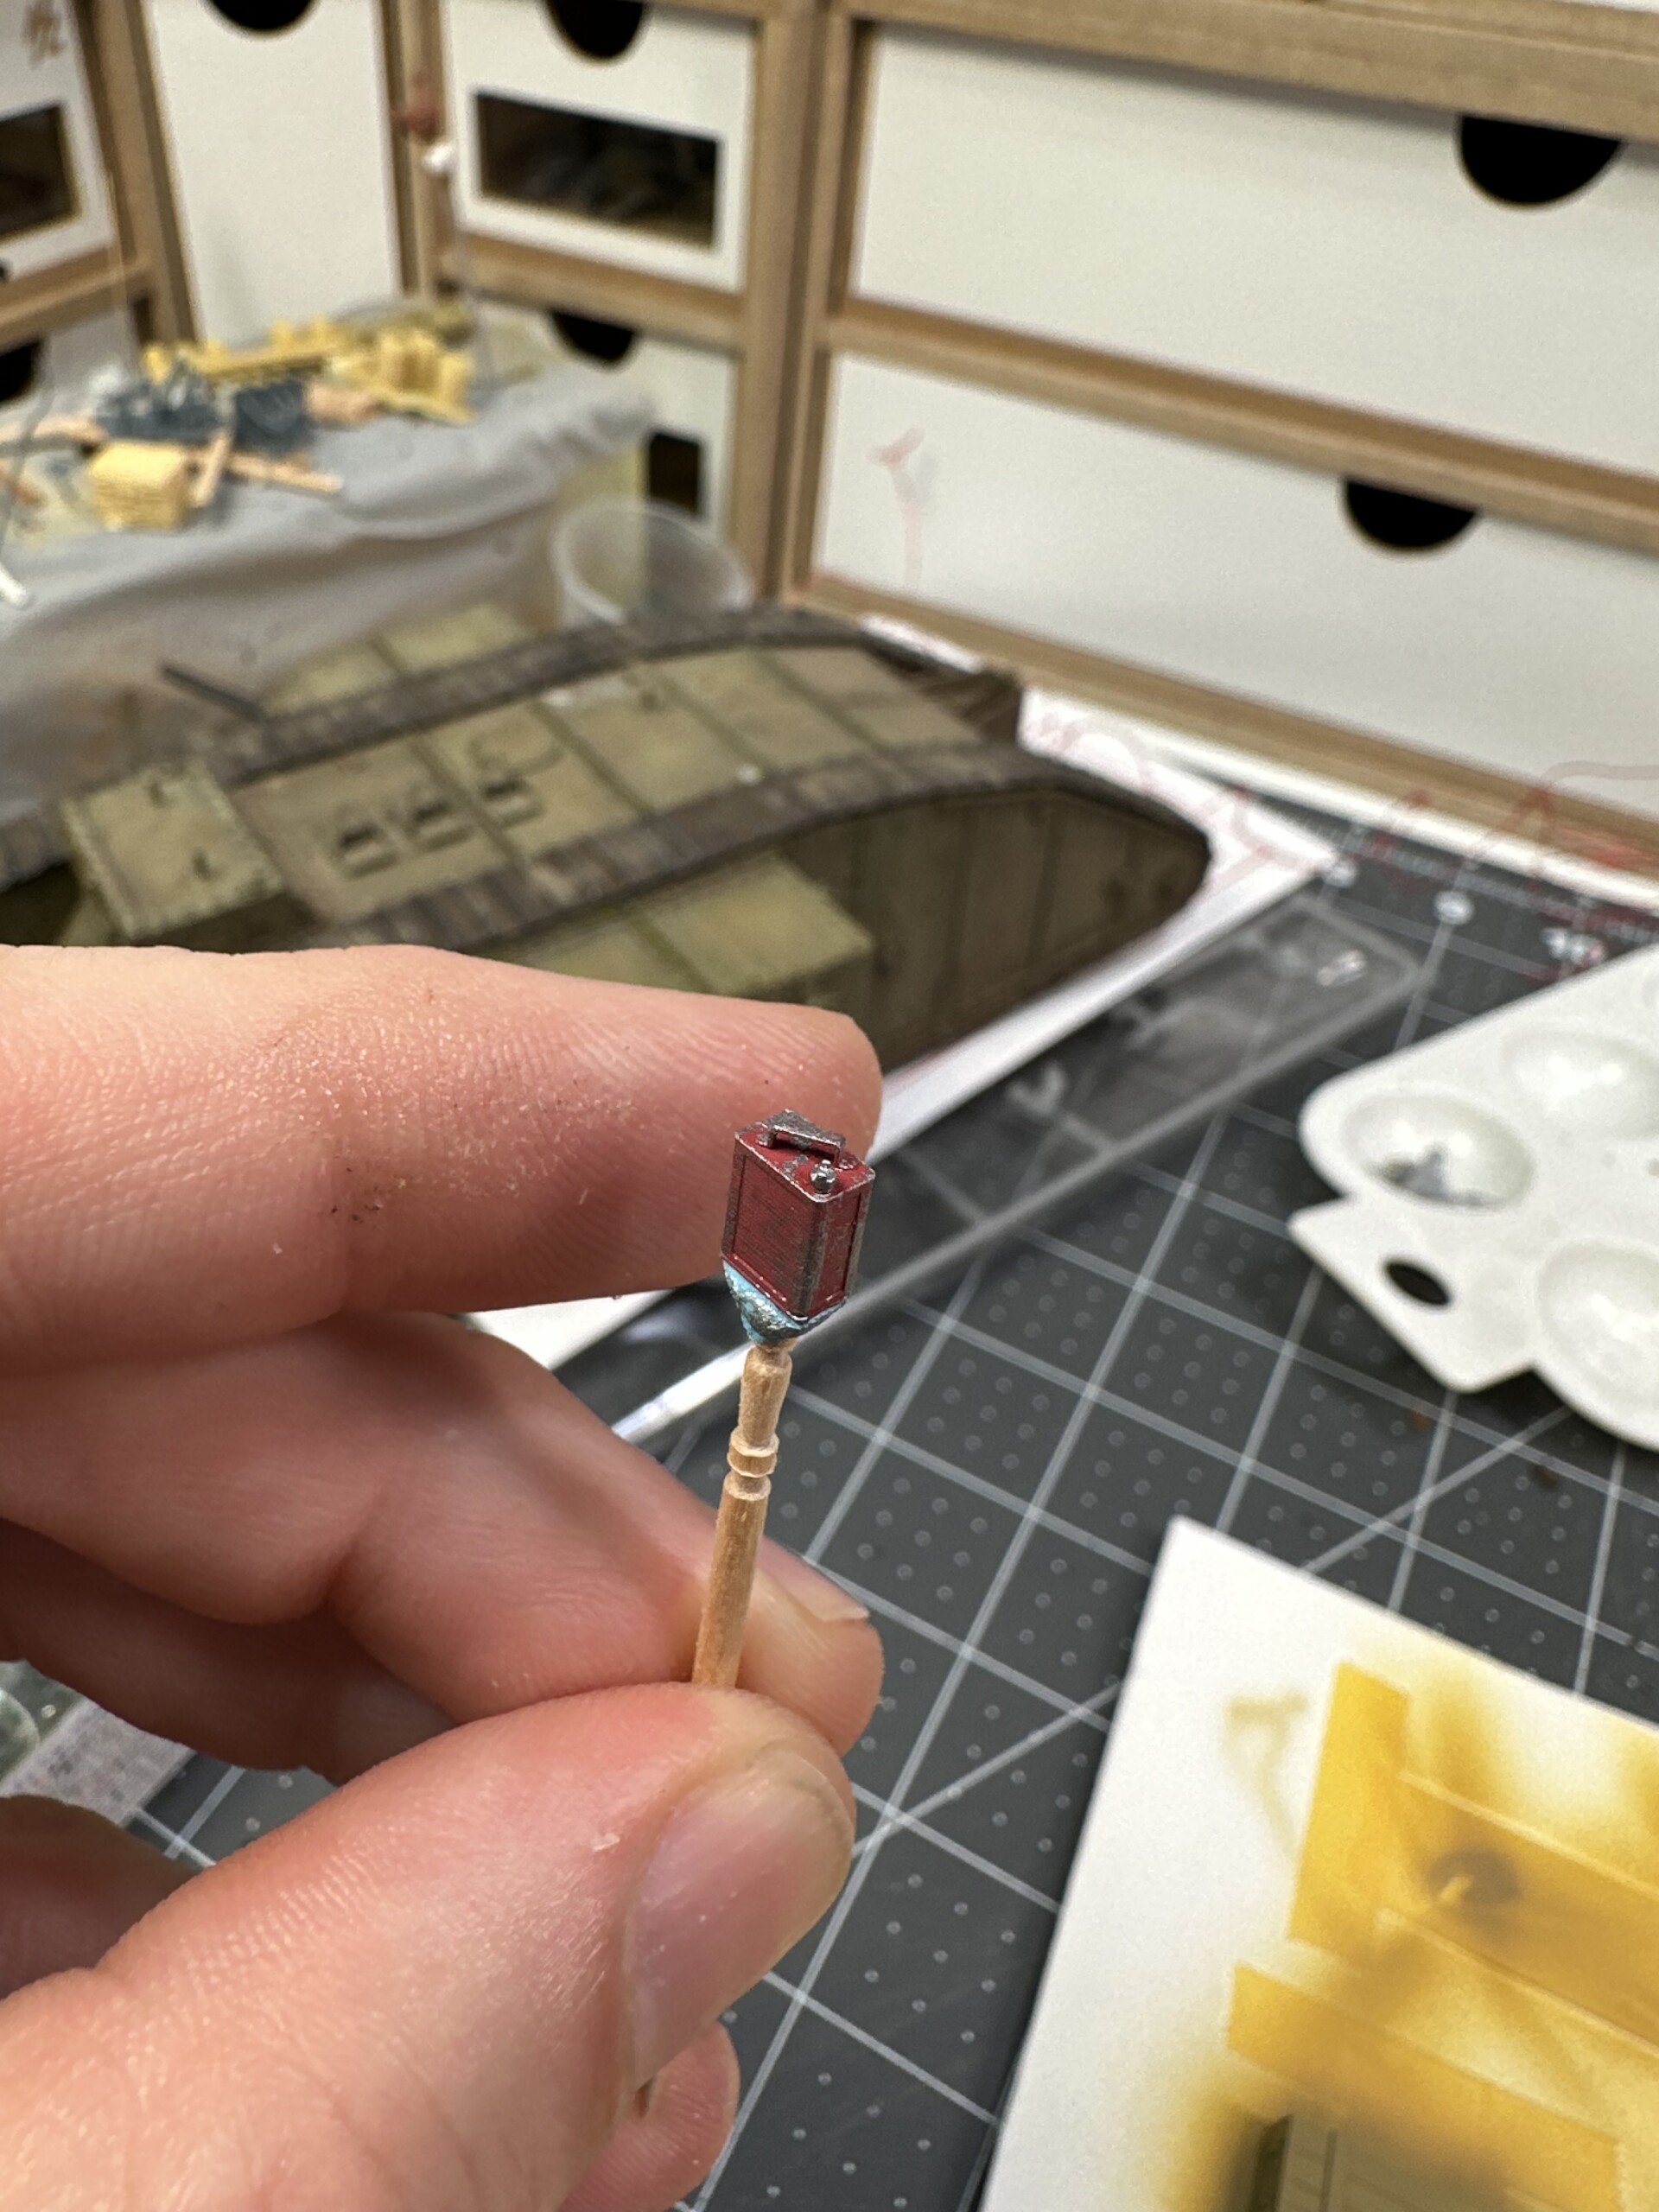
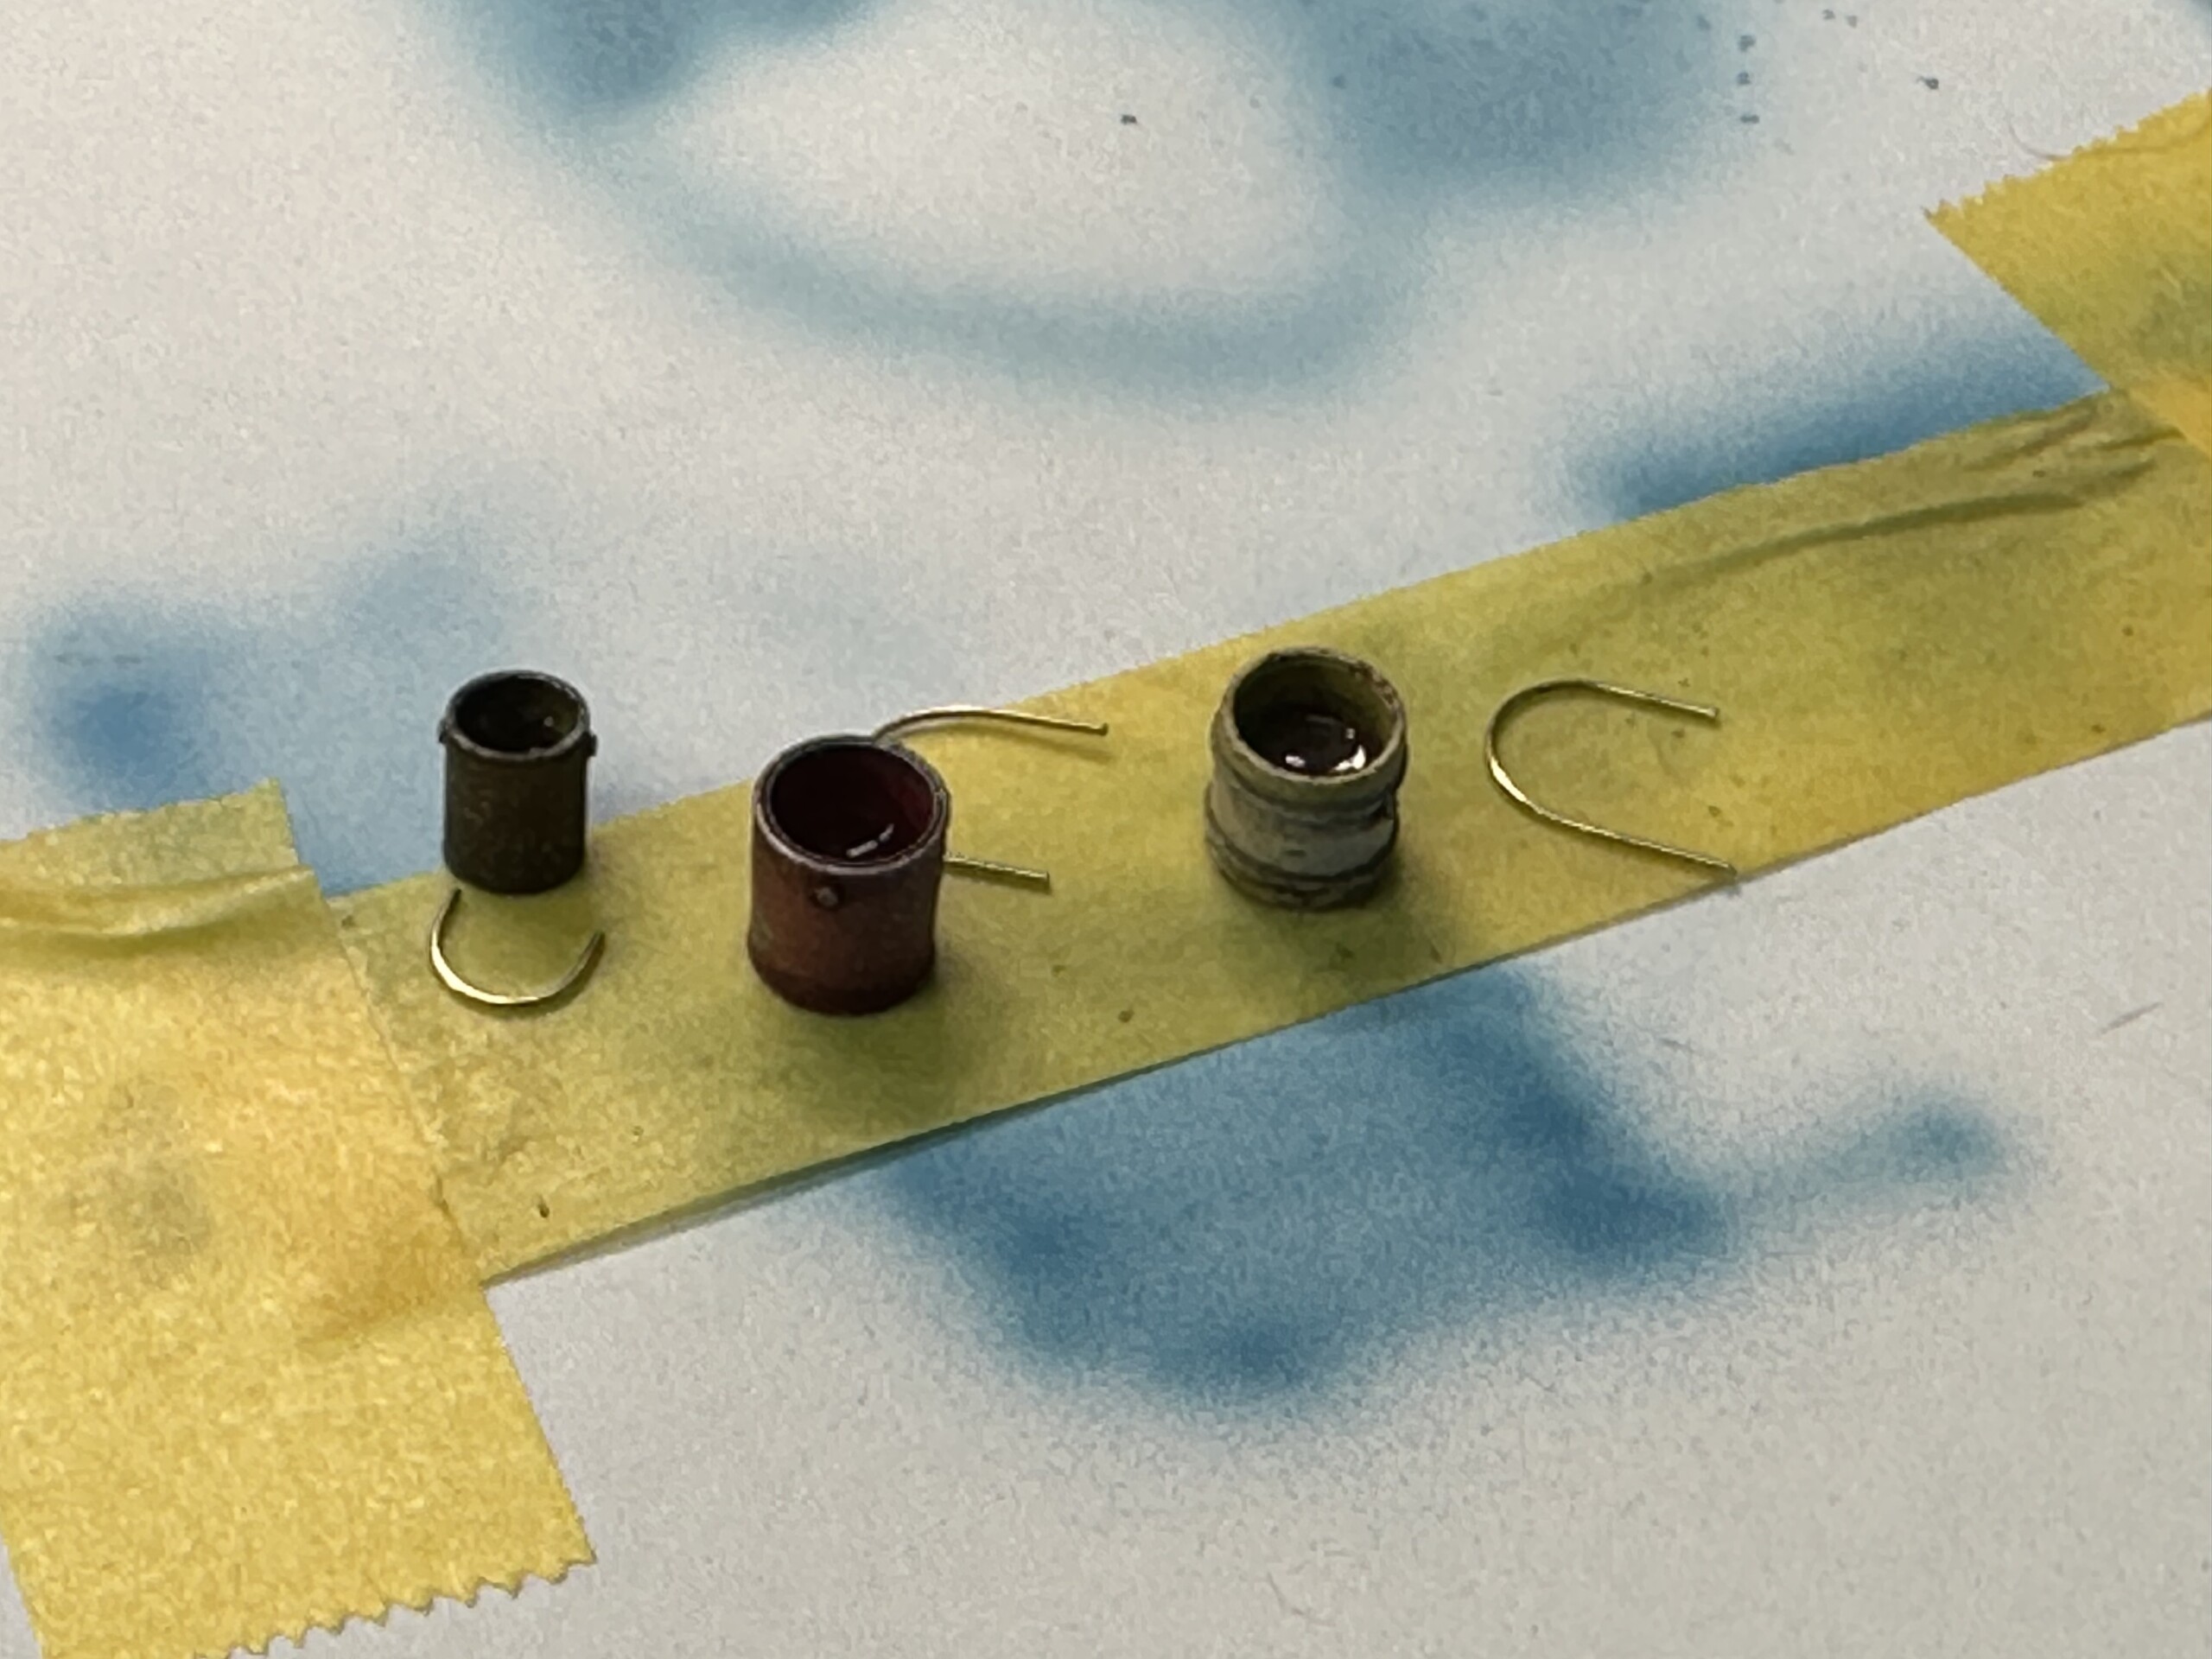
I wanted the trench messy and one of the more interesting features I saw in the reference photos was the phone lines. I have no idea if this is totally accurate… but hey, looks cool. The pole is made of twigs and the lines are just lead wire. I made little “hanger” eye bolts out of bent brass wire.


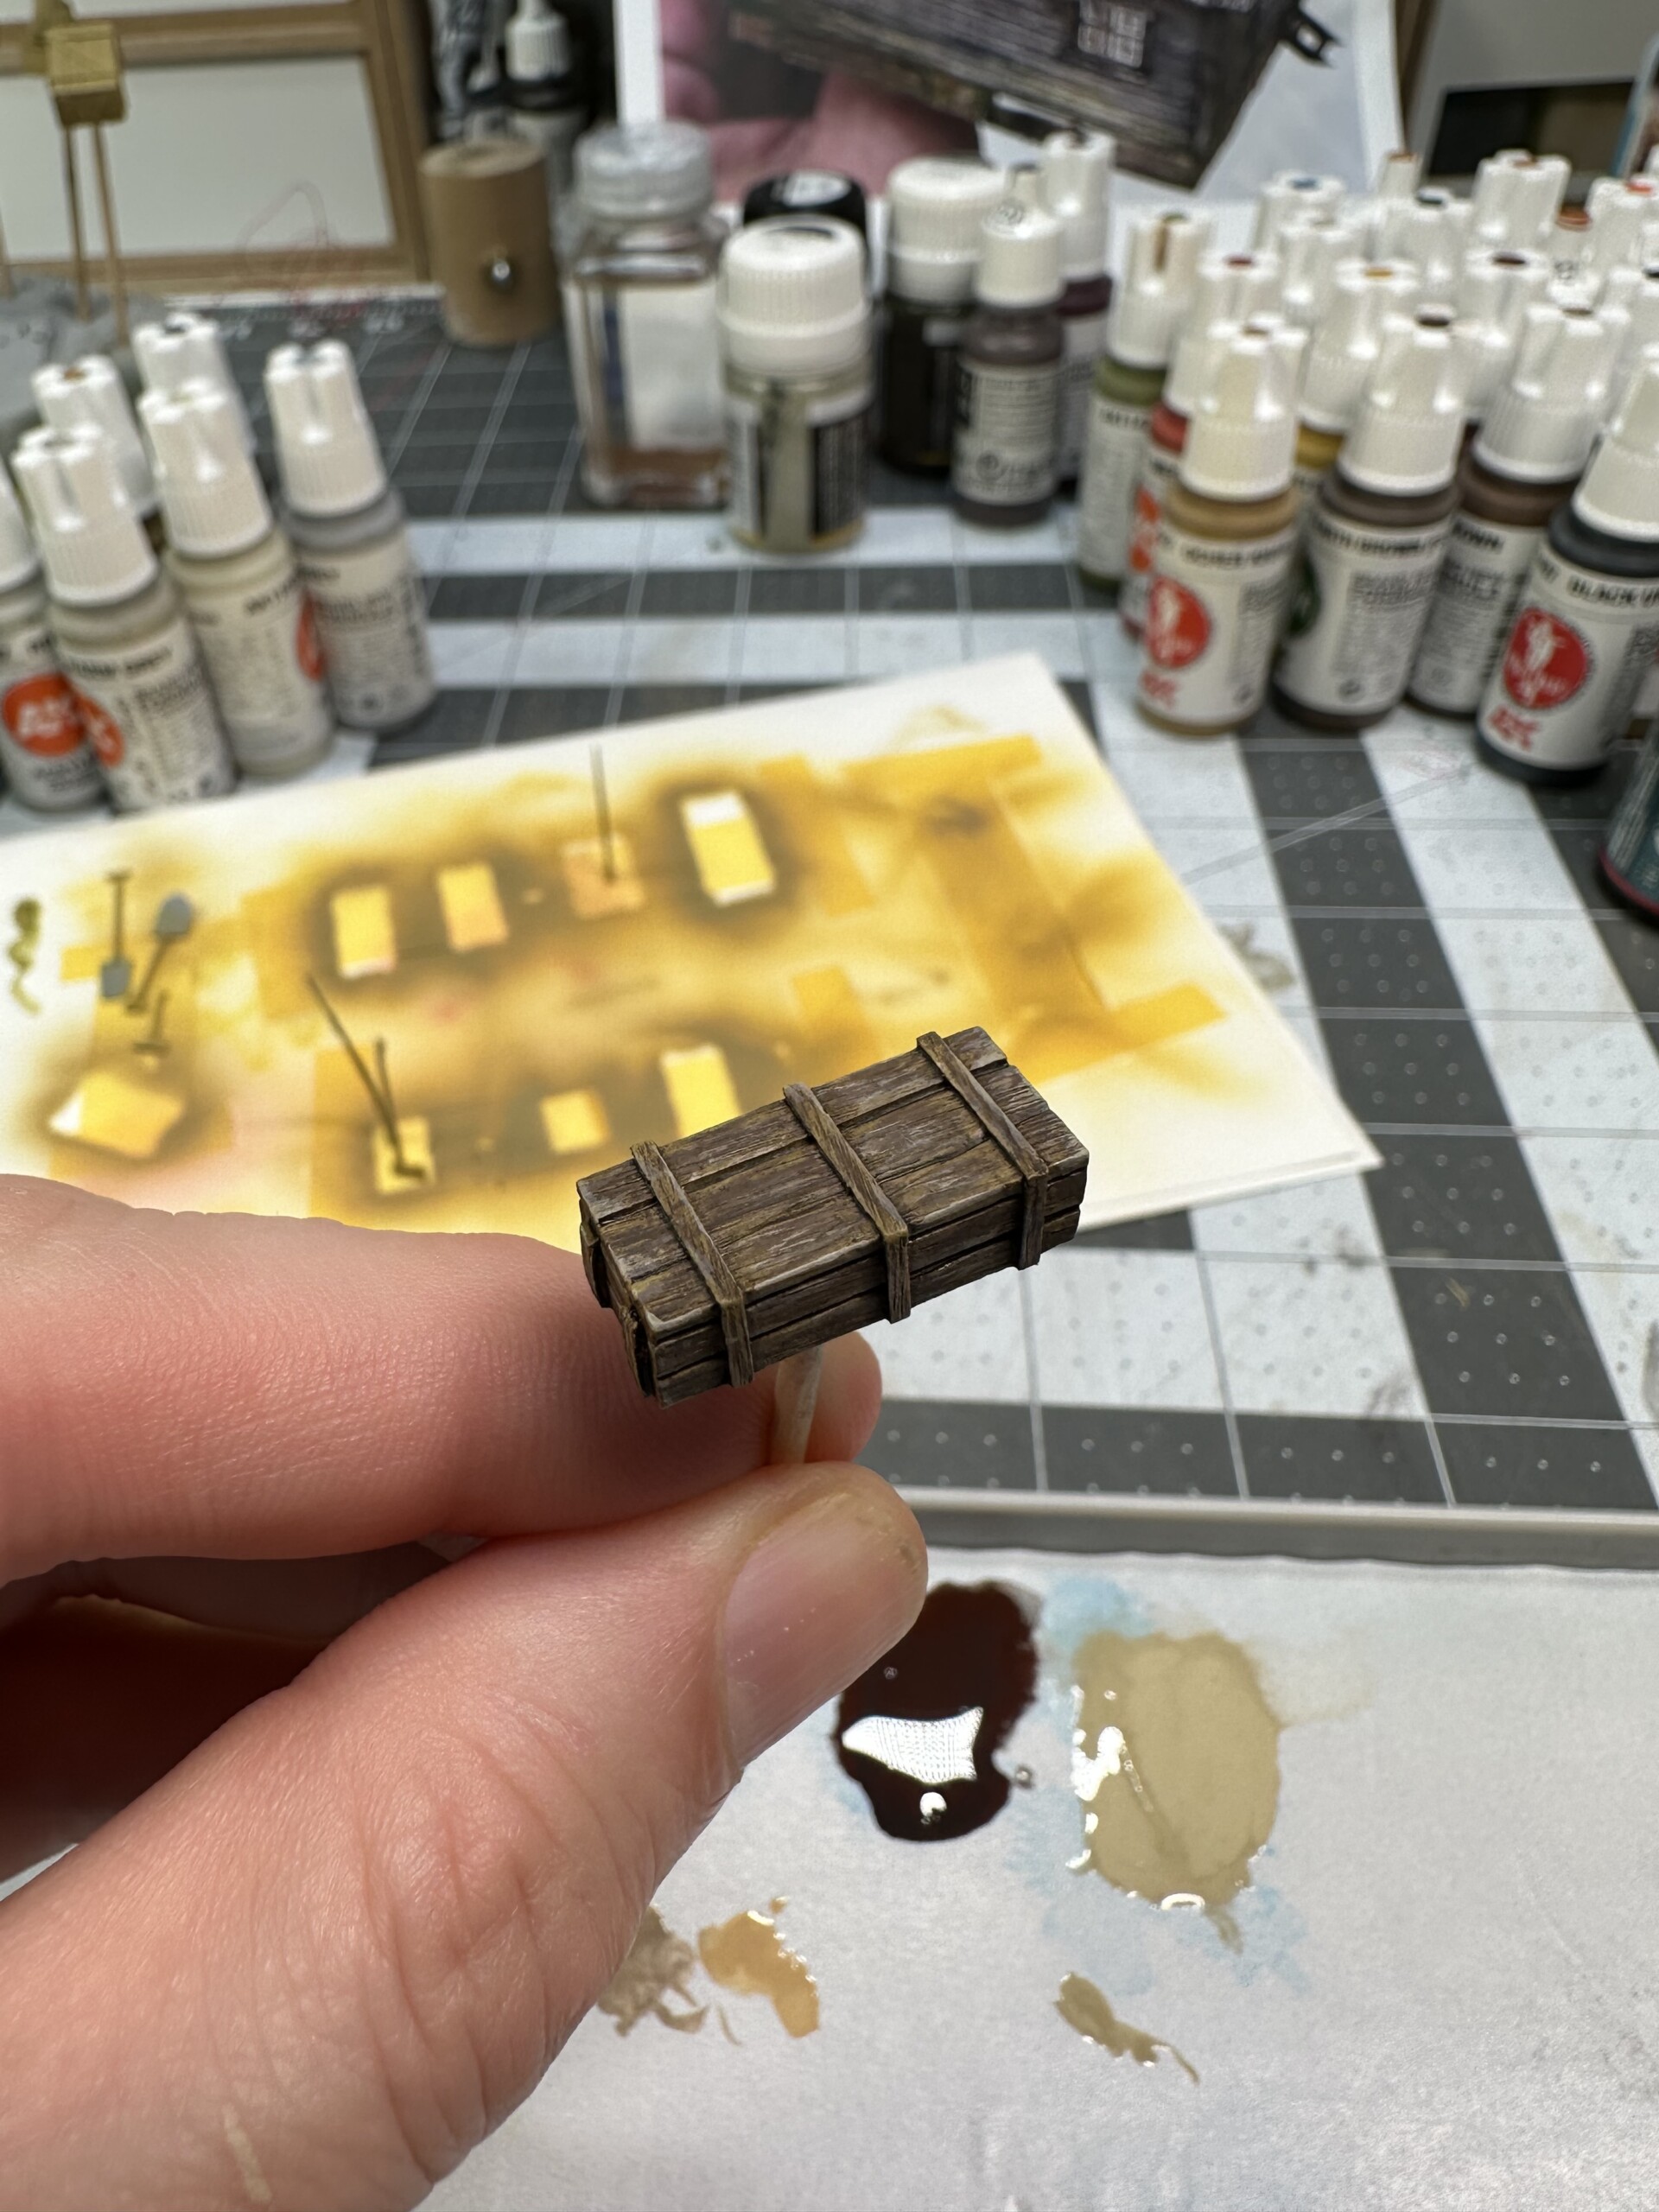
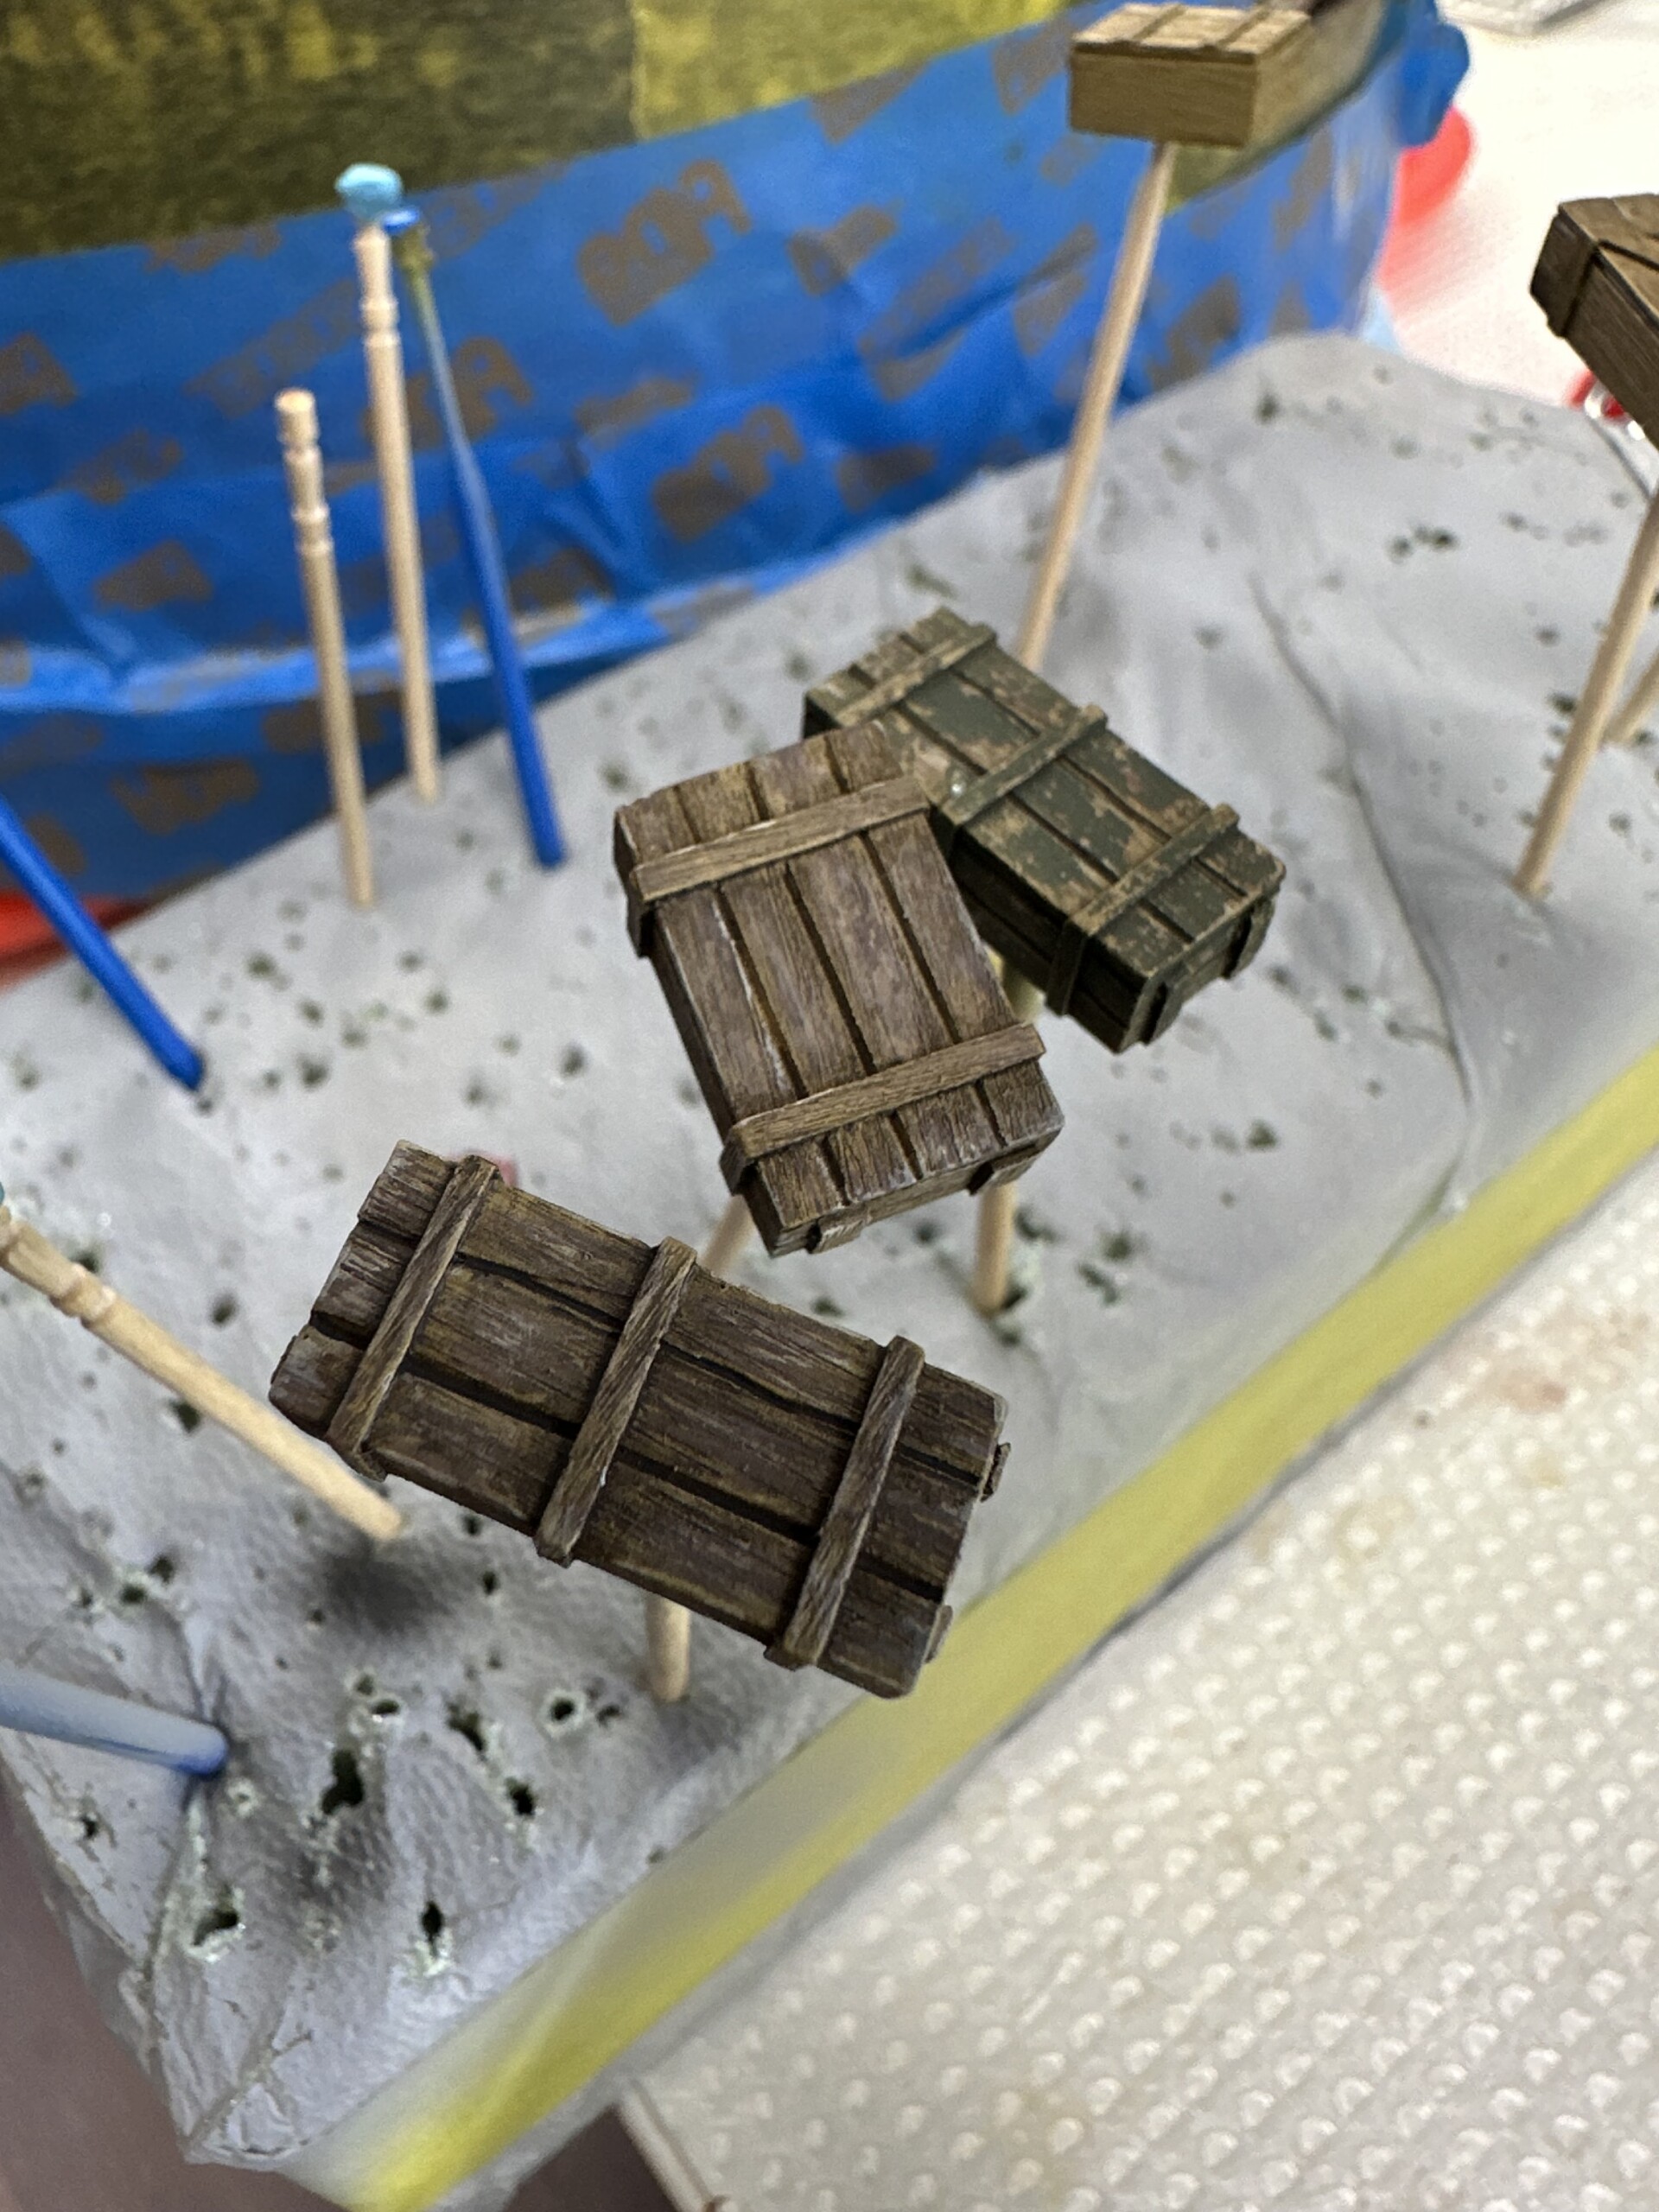
The accessories
Now the really fun part… filling up the trench and making it look lived in!

The coolest accessory
I tried a new trick that turned out REALLY cool… transferring laser printed markings onto wood. This is surprisingly easy:
- Work in Photoshop (or Word, etc.) to design your sign content. In this case, I just made some text
- Reverse the text like you would to see it correctly in a mirror
- Print it on your laser printer
- Brush gel medium (I used Golden Fluid Matte Medium) onto the paper and let it sit for 10 seconds or so
- Turn it over onto the wood you’re trying to transfer it to and gently press it into place
- Let it dry, likely overnight
- The next day, use small amounts of water and gentle pressure to “wipe away” the paper backing
- Cut wood to size and weather
Easy! (Even if you have to practice as few times)


The canvas curtain
As I mentioned earlier, the canvas curtain was applied at the end of the project. This was meant to ensure that it didn’t get beat up since I knew it’d be fragile. But it ended up being a massive level of difficulty to get it where it needed to be. The curtain was made from a sheet of VMS shaping paper and shaped with the VMS Paper Shaper liquid. Not sure I feel about this product, but I am withholding judgement until I’ve played around a bit more.

The name placard
Years ago, someone taught me a cool trick for making easy “brass” name placards for your dioramas:
- Buy gold cardstock paper at a craft store. Make sure it can be used in a laser printer
- Design your name placard in Photoshop or even Word, etc. Make sure to include a black box around the text
- Print it out, cut it out with an Xacto
- Take a Sharpie and run it over the cut edges to make them match the black box
- Use a glue stick to adhere it to the diorama base
Easy! And super cheap. It’s not the same as a true brass placard, but also much more flexible to mount (literally) and to come up with your own fonts and designs.

Mounting the tank
Mounting the tank was a pretty straightforward task. Add pins to the bottom of the tracks, glue the tracks and the pins down, and then push a small amount of VMS Smart Mud up around the tracks. Once everything was dried, I hand painted the same groundwork tones back into the new Smart Mud to make sure everything blended.

The final product!
This entire project started and finished in something like four months. This is remarkably fast for me. I had set a deadline to be able to take it to IPMS Nationals and I BARELY made it. The entry deadline was Friday at noon and I rolled in Friday morning with the paint still wet. But I made it!
Shout out to the Vegas AMPS chapter member who dropped one of their challenge poker chips on the diorama. That was super cool!


