What do you do when the figure you need simply doesn’t exist? For most modelers, that means either settling for something close enough or diving into the painstaking world of custom sculpting … wire armatures, green putty, hours of sculpting. (And if you’re me… redoing all those things a few (hundred) times)
But a new generation of AI tools is opening up a third option: describe what you want, generate it, and print it. The workflow is imperfect and still maturing, but for the right projects, it’s already delivering results that would have been impossible just six months ago. And it boggles my mind to think what’s going to be possible in 6 more months…much less a couple years.
In preparation for an interview with our friends Mike and Dave at the Plastic Model Mojo podcast, I wrote up some thoughts. This post walks through the process of using AI image generators and 3D conversion tools to produce custom 3D-printable figures. This is the experience of this one nerdy modeler’s experience who has been experimenting with the approach on an active civilian post-war diorama project.
Why AI? The case for unique figures
The catalyst for this workflow isn’t convenience, it’s necessity. When a modeler has a specific story to tell, generic off-the-shelf figures often fall short. Poses are limited, expressions are stock, and the combination of outfit, attitude, and context that makes a scene feel alive rarely comes pre-packaged.
For the project I’m working on, these three figures I need just didn’t exist anywhere in the world. There wasn’t anything even remotely close to it because it was a unique idea out of my own head. That’s the core motivation: not laziness, but ambition. The figures required weren’t rare finds on obscure hobby sites; they were genuinely original creations.
It’s worth noting that this approach is best suited to flexible, interpretive projects. A civilian scene like my diorama born from imagination, for instance, rather than exacting historical recreations where every detail of a specific soldier from a specific unit on a specific date must be accurate. The (current) AI workflow rewards creative latitude.
Two paths to a 3D model
Before diving into the workflow, it’s worth understanding that today’s AI tools offer two distinct approaches to automatic 3D model creation:
Text Prompt to 3D Model: You describe the figure you want in words, and the AI generates a 3D model directly from that description. It’s the most direct path, but the results can be harder to control — subtle details about pose, expression, and proportion are difficult to convey through text alone, and the output can feel generic or misaligned with your vision.
Image to 3D Model: You first generate (or provide) a photorealistic image of the figure you want, then feed that image into a 3D conversion tool. This two-step approach gives you much more control — you can iterate on the 2D image until it matches your vision before committing to the 3D conversion. This is the approach detailed in the workflow below, and for custom figures with specific poses and details, it tends to produce significantly better results.
For this article, I’m going to walk you through how I did the Image to 3D Model process.
Meshy.ai — Tripo3D
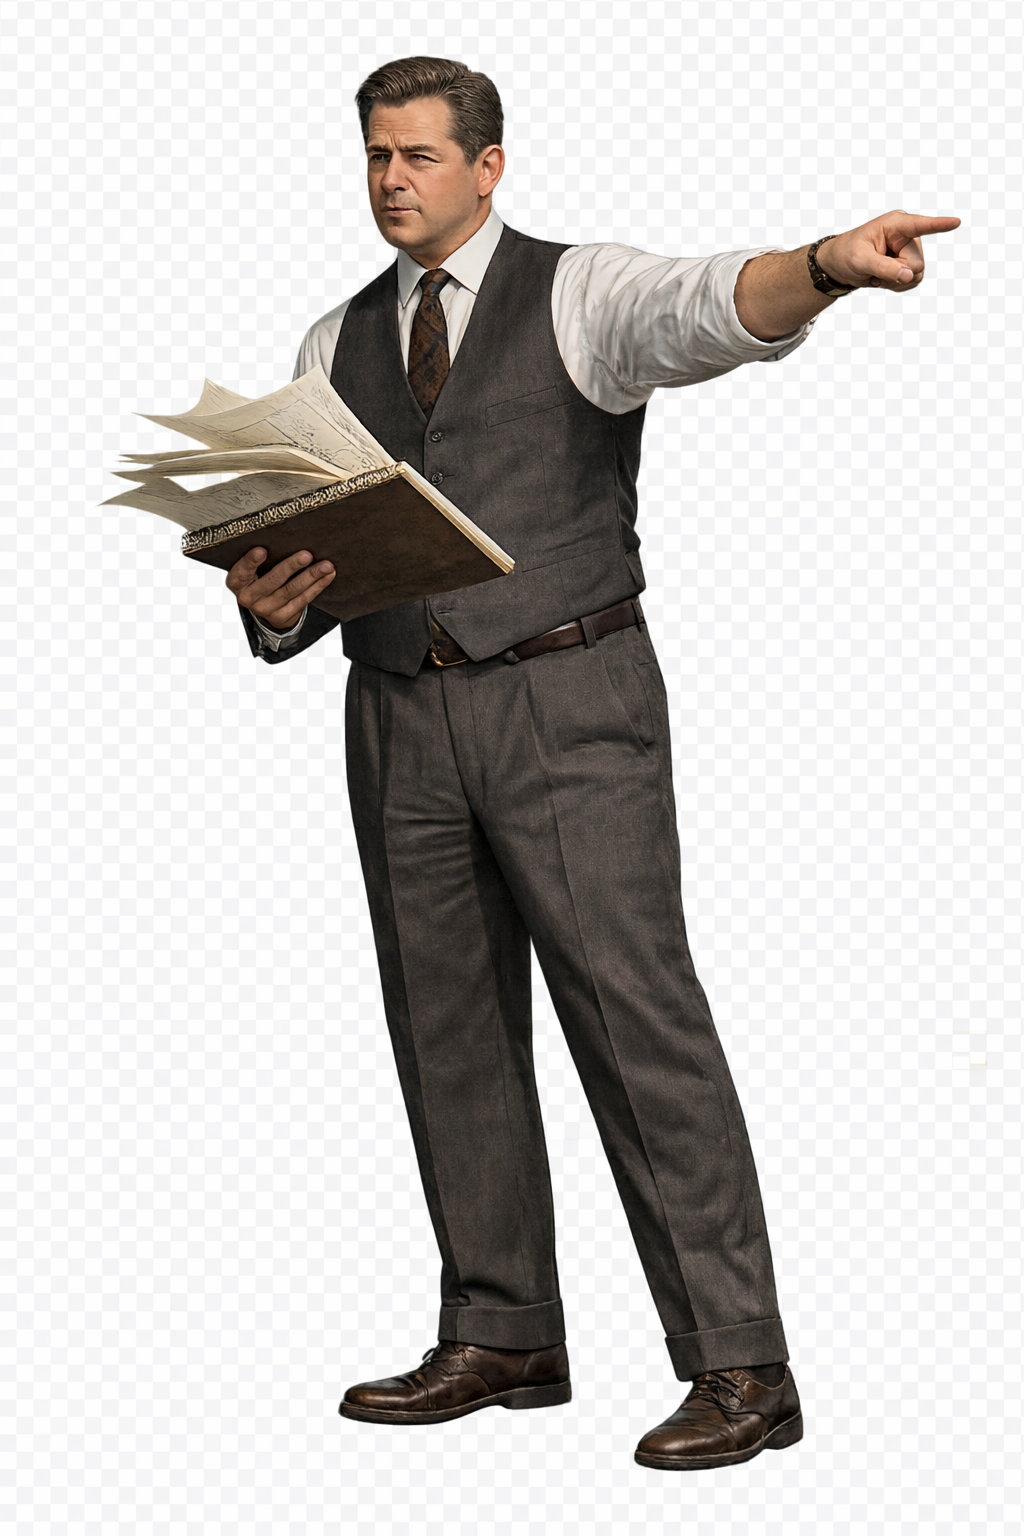
Step One: Concept and photorealistic image generation
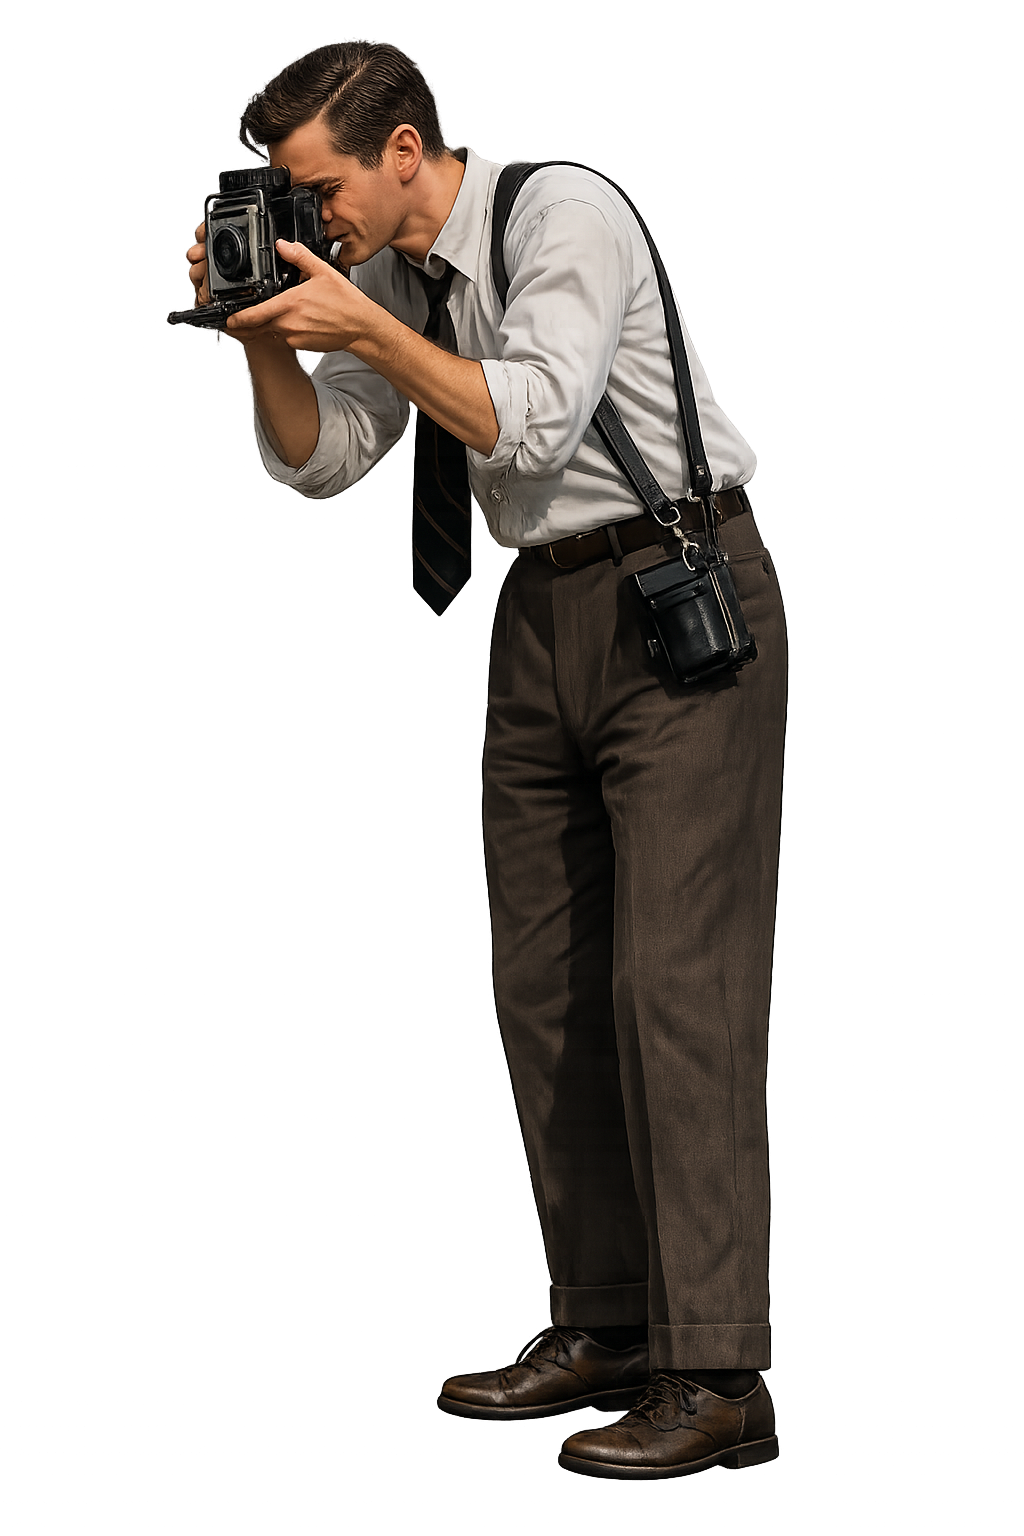
The process begins well before any 3D software is opened. The first task is to develop a clear mental image of the figure: the pose, the expression, the clothing, the attitude. The more precisely you can articulate these details, the better your results will be downstream.
That description is then taken into an AI image generator to create a photorealistic image. In this case, I used both ChatGPT and Google Gemini with the goal of producing a photorealistic image that is as close as possible to the intended figure. This is not a one-shot process. It requires iteration, refinement, and sometimes multiple attempts before the result looks right. Getting your prompt writing skills upleveled will do wonders for your output…kinda like most anything in life. The better you describe what you want the more likely you are to get it.
The complexity of the pose matters enormously at this stage. A figure standing upright, looking forward, with arms at his sides? The AI handles that easily. A man seated behind a large steering wheel, knees drawn up toward his chest to fit inside a cramped WWII Jeep? That involves hidden spatial relationships – the angle of the legs, the geometry of the vehicle, the way the arms reach forward – and the AI struggles to resolve them into a coherent, believable image.
Make sure that you develop an image that is ONLY the figure. Any other background noise, vehicle parts, etc will cause all kind of problems later.
Pro tip: You can find reference photos and include them in your prompting. But be careful to stick to pretty similar poses so that the AI doesn’t get flooded with possibilities. Garbage in, garbage out.
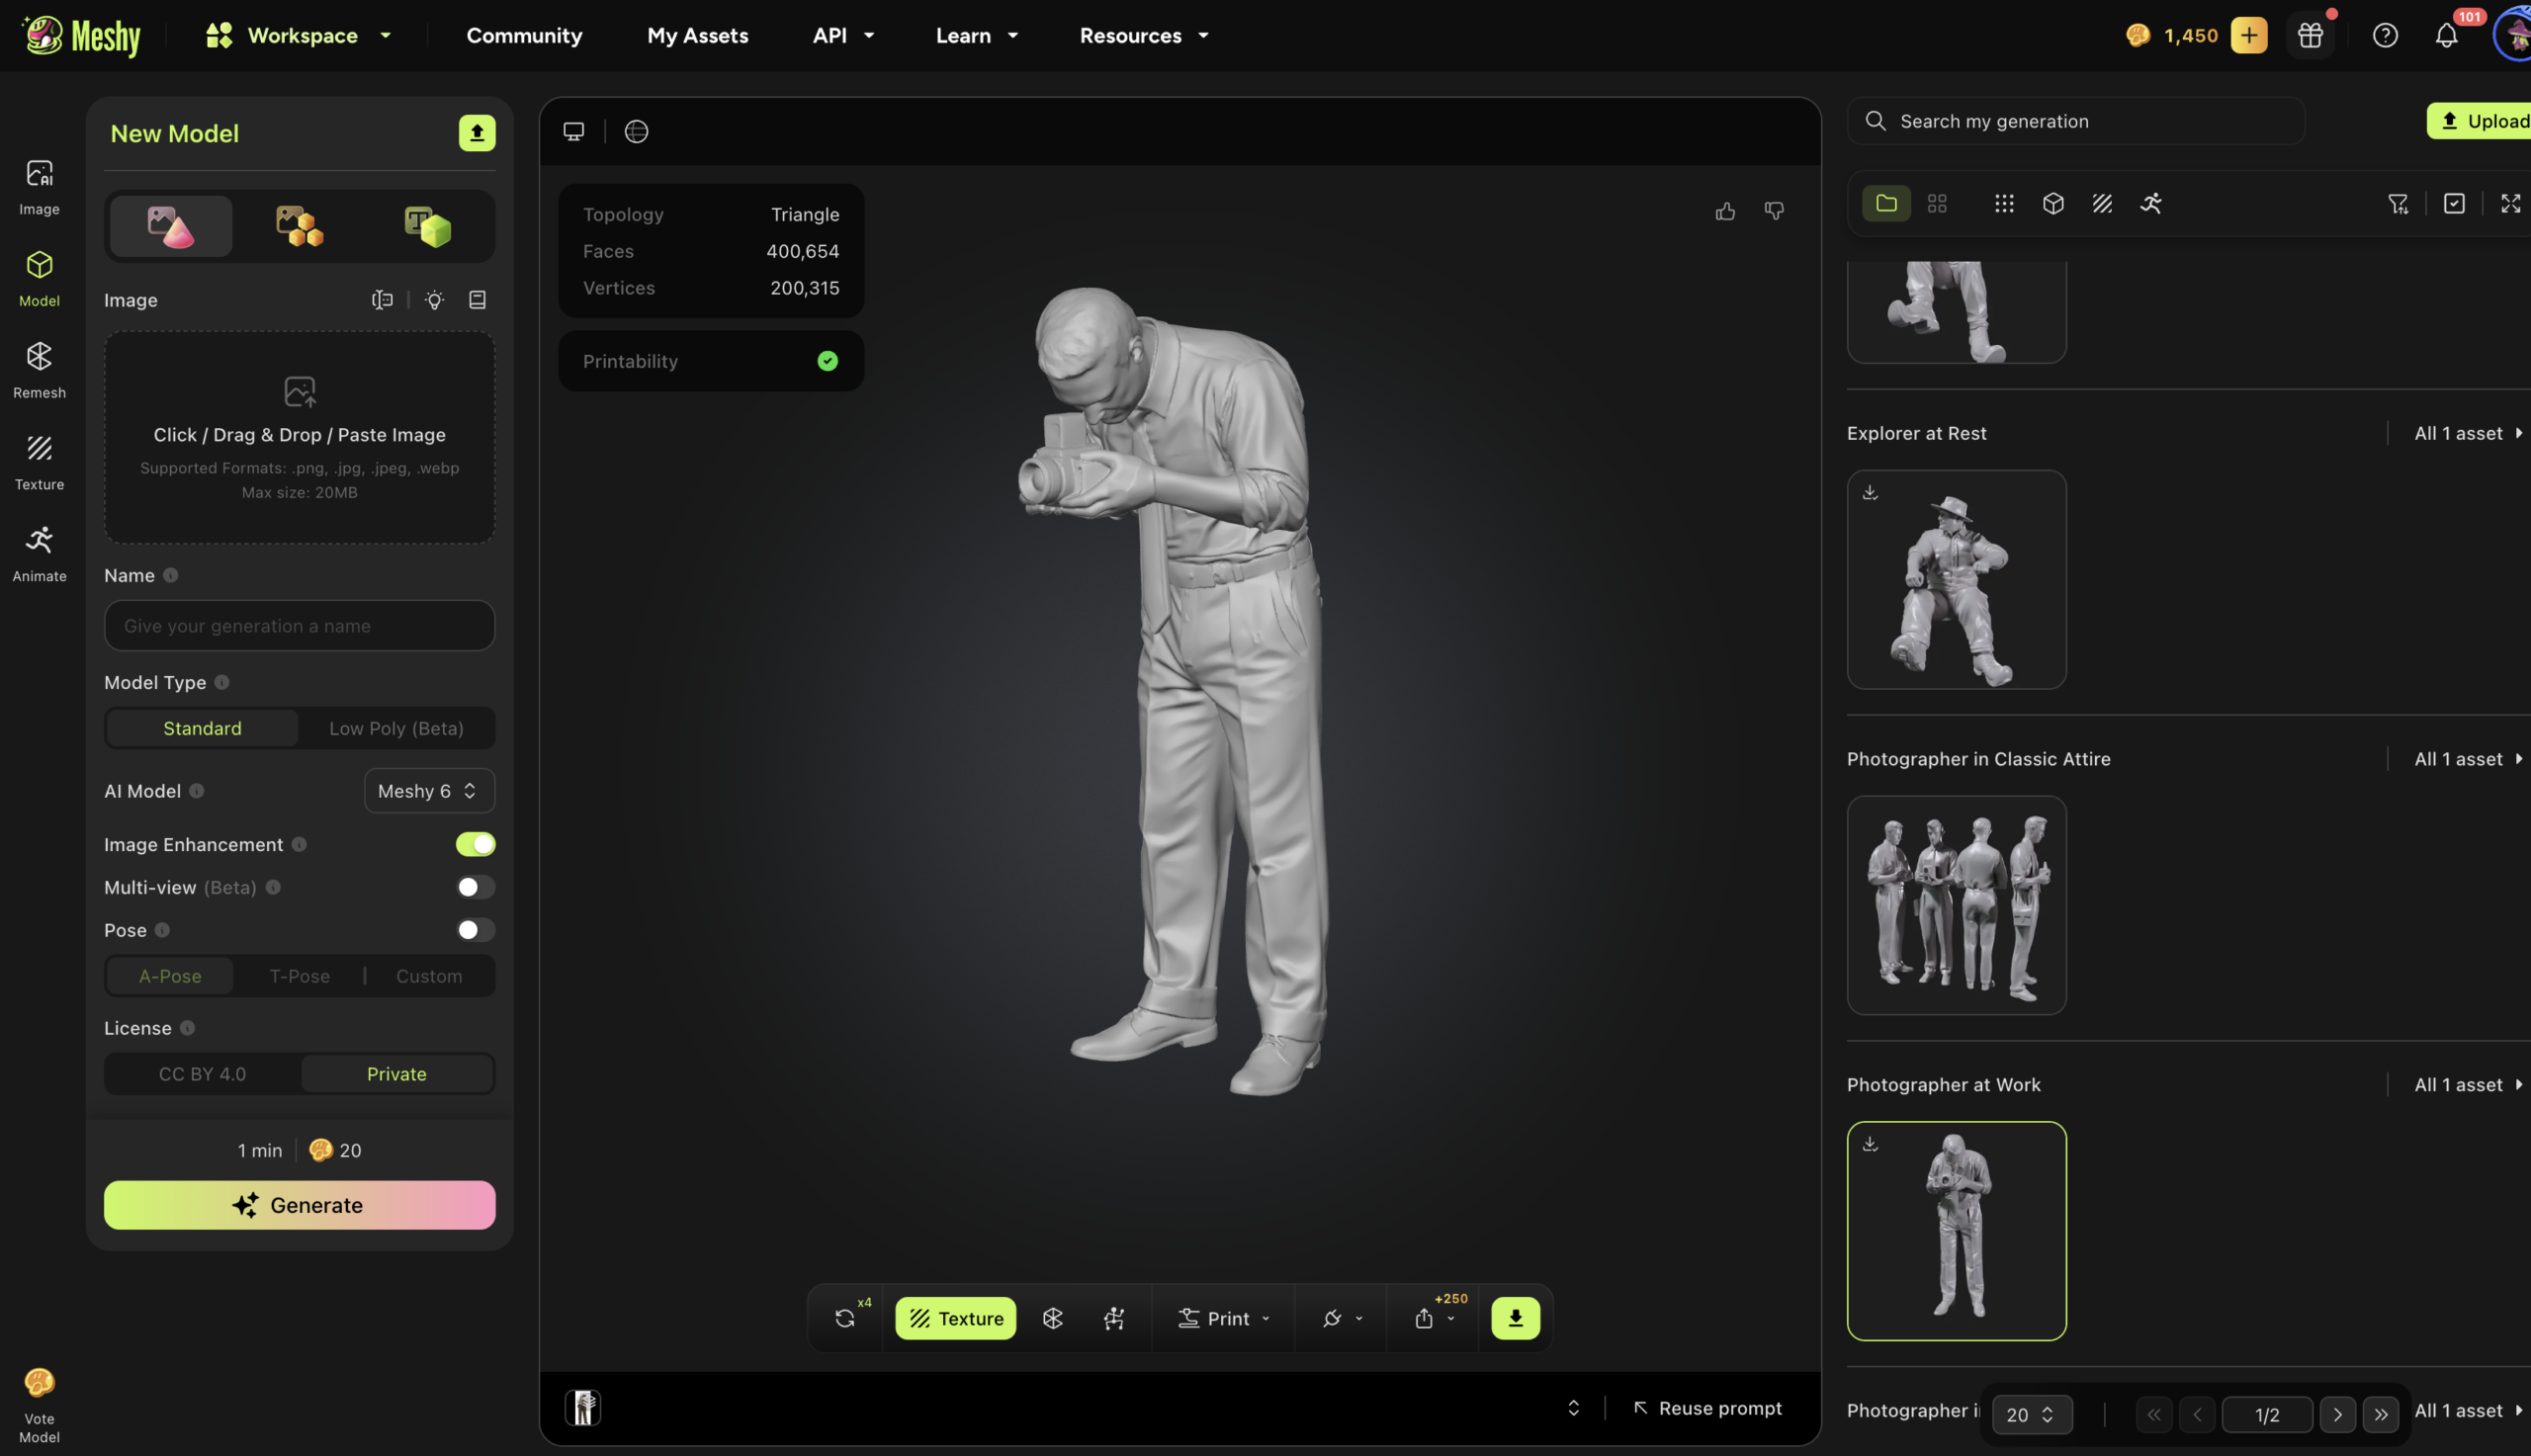
Step Two: Converting images to 3D models
Once you have a photorealistic image you’re satisfied with, it goes into a 3D conversion tool. Two platforms I’ve been using:
Meshy (meshy.ai): Fast processing. Results often come back quickly…but the output can sometimes be softer or less detailed. Good for simpler figures and initial tests.
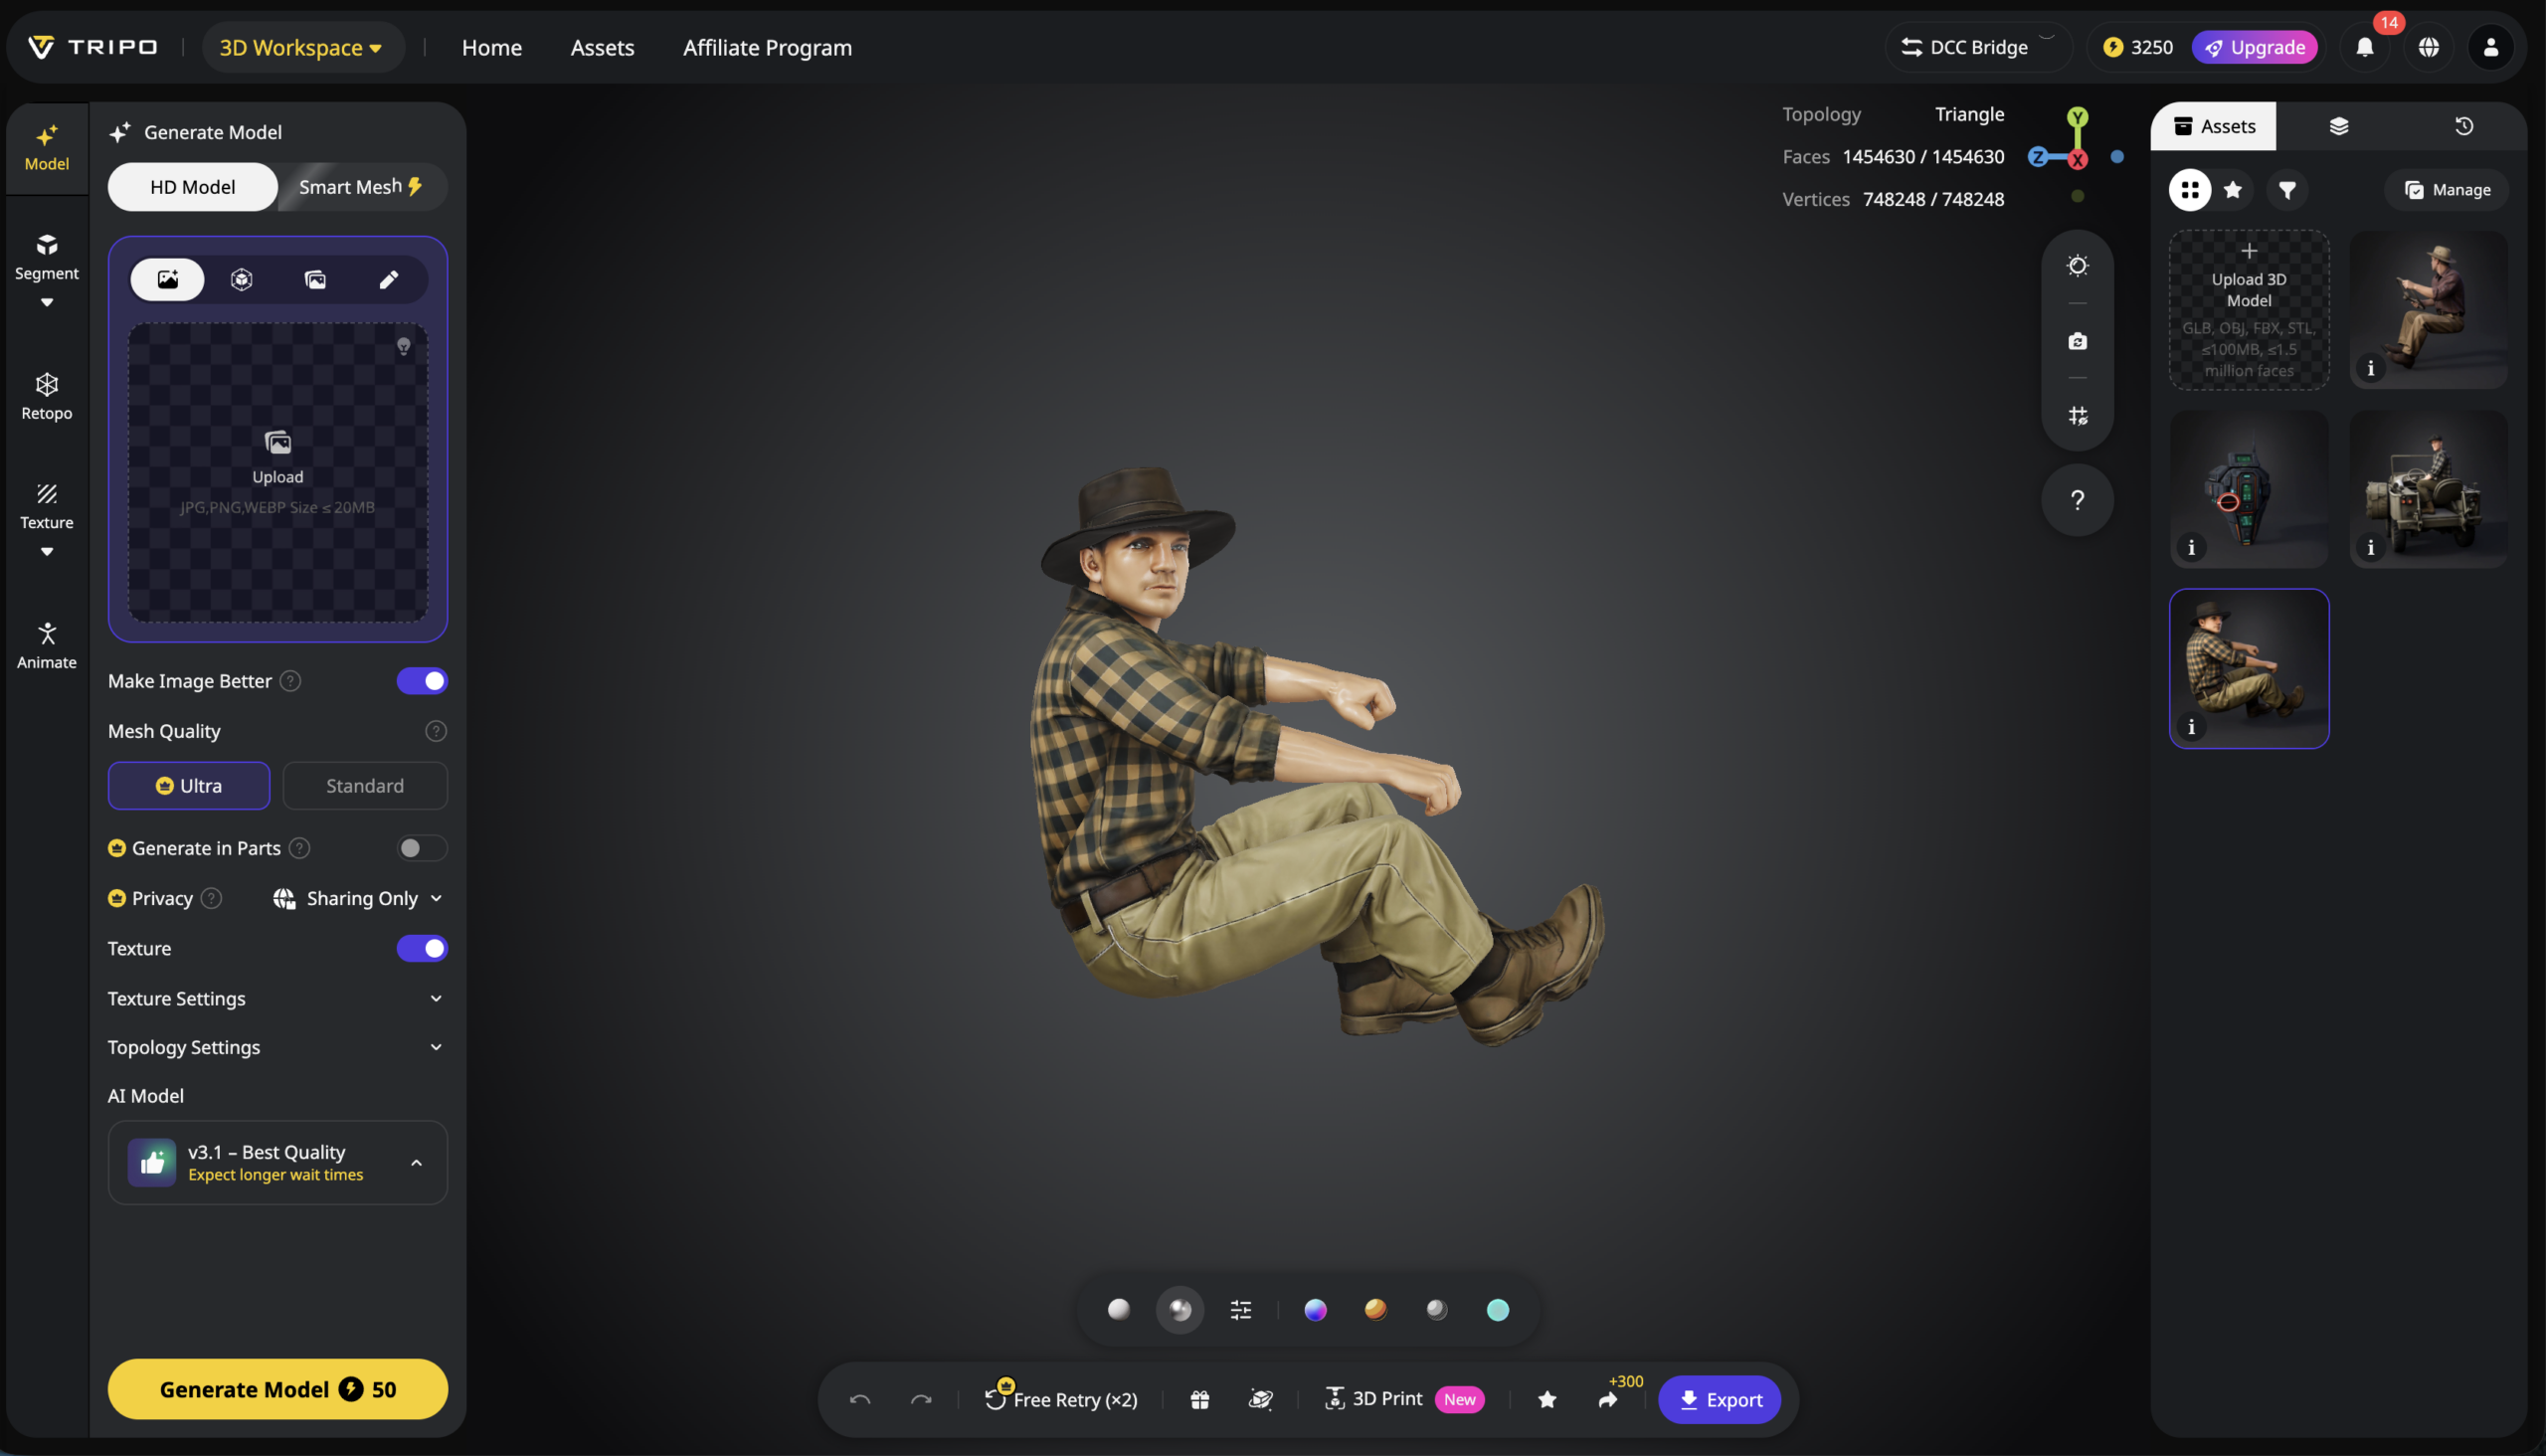
Tripo (tripo3d.ai): Significantly slower. Sometimes 10-15 minutes or more for complex design. But generally produces sharper, more detailed results. Worth the wait for figures that need to hold up at scale.
Both platforms operate on a credit system, so there is a cost per conversion. Neither guarantees a usable result on the first try. The tool sometimes needs to be re-run several times before it produces something printable. For a simple, upright figure, a good result might come on the first or second attempt. For a complex, seated figure, you might run it a dozen times over several weeks as you work and tweak.
The goal is to get a printable file straight out of the converter. That’s not always (if ever) achievable, which brings us to the next stage.
Step Three: Refinement and the Blender Problem
When the 3D converter produces a model with minor issues – a nose that’s slightly too small, ears that are undersized, an arm that needs to be rotated a few degrees – the ideal solution is to open the file in Blender and make targeted adjustments. Blender is free, powerful, and widely used in the 3D community.
The challenge is that Blender has a steep learning curve. For a modeler whose skills and interests lie elsewhere (raising my hand over here), like the painting, the storytelling, the diorama composition, learning Blender for the sake of minor tweaks may not be an attractive proposition.
A practical workaround is to find a specialist on a platform like Upwork. What may take a skilled Blender expert five minutes would take me, a lowly Blender novice two hours or more. But be cautious. Lots of “Blender experts” who are just garbage at the tasks. It’ one of the games in my workflow, so if you know anyone credible….
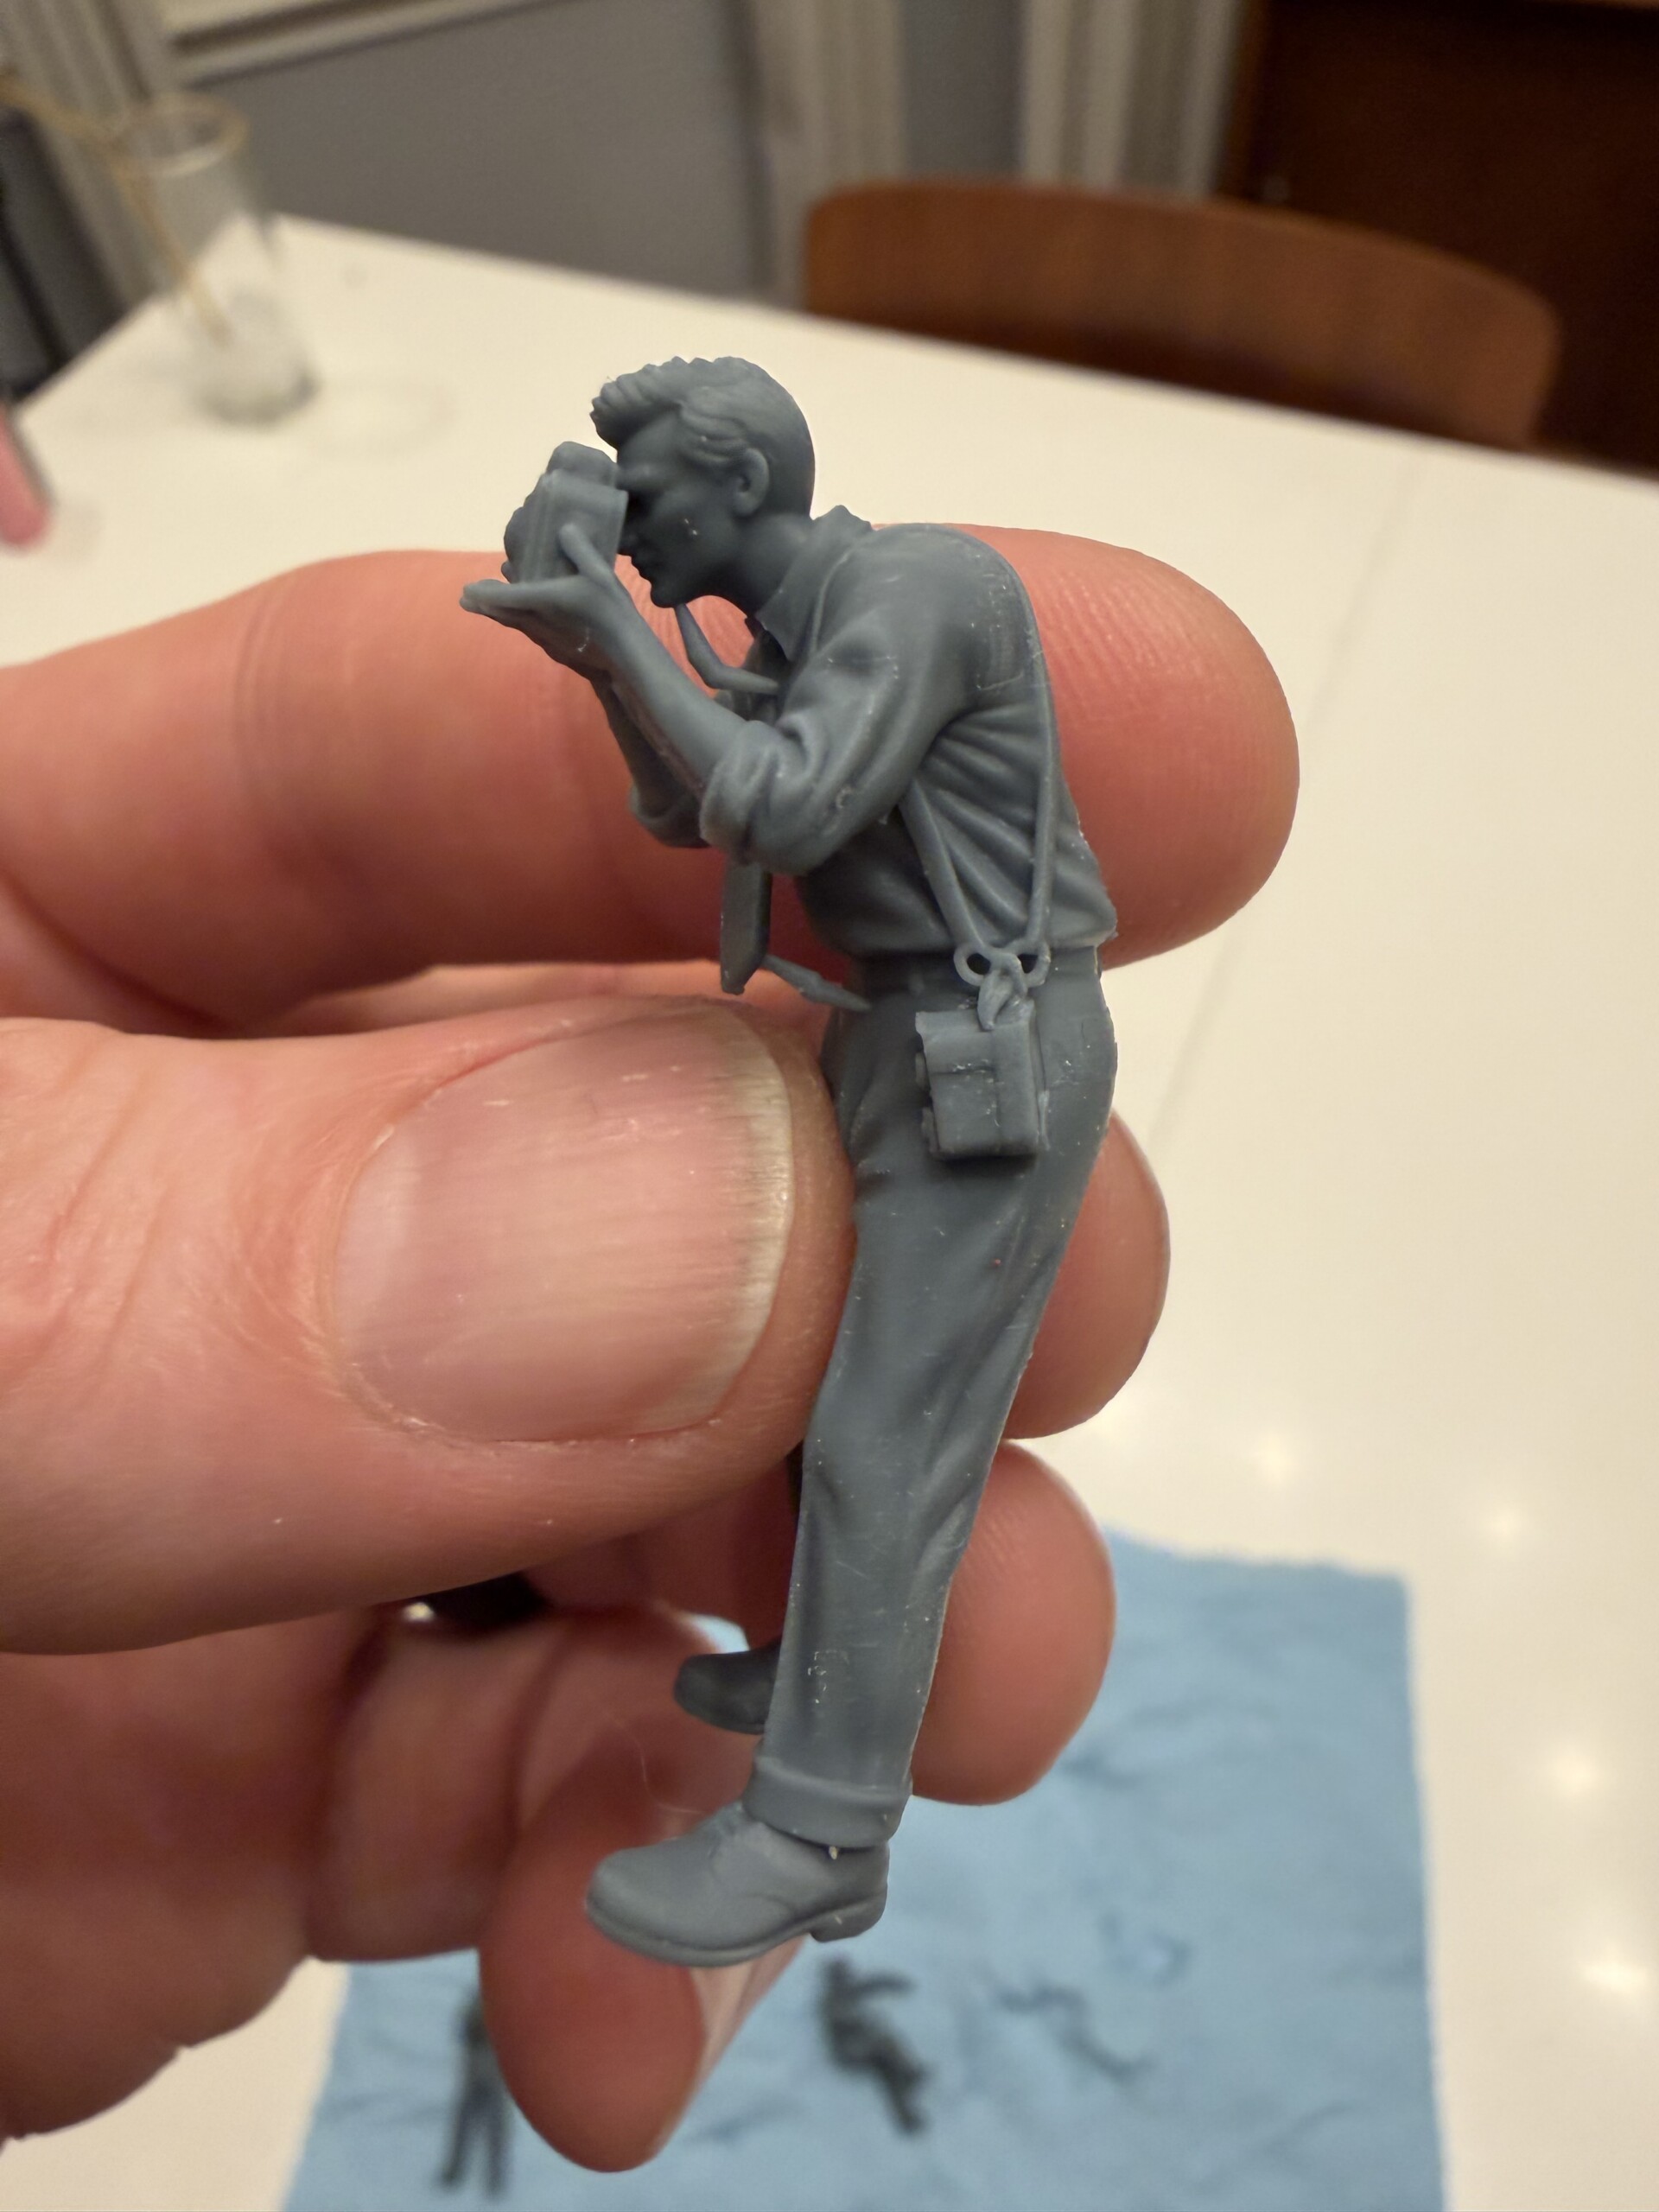
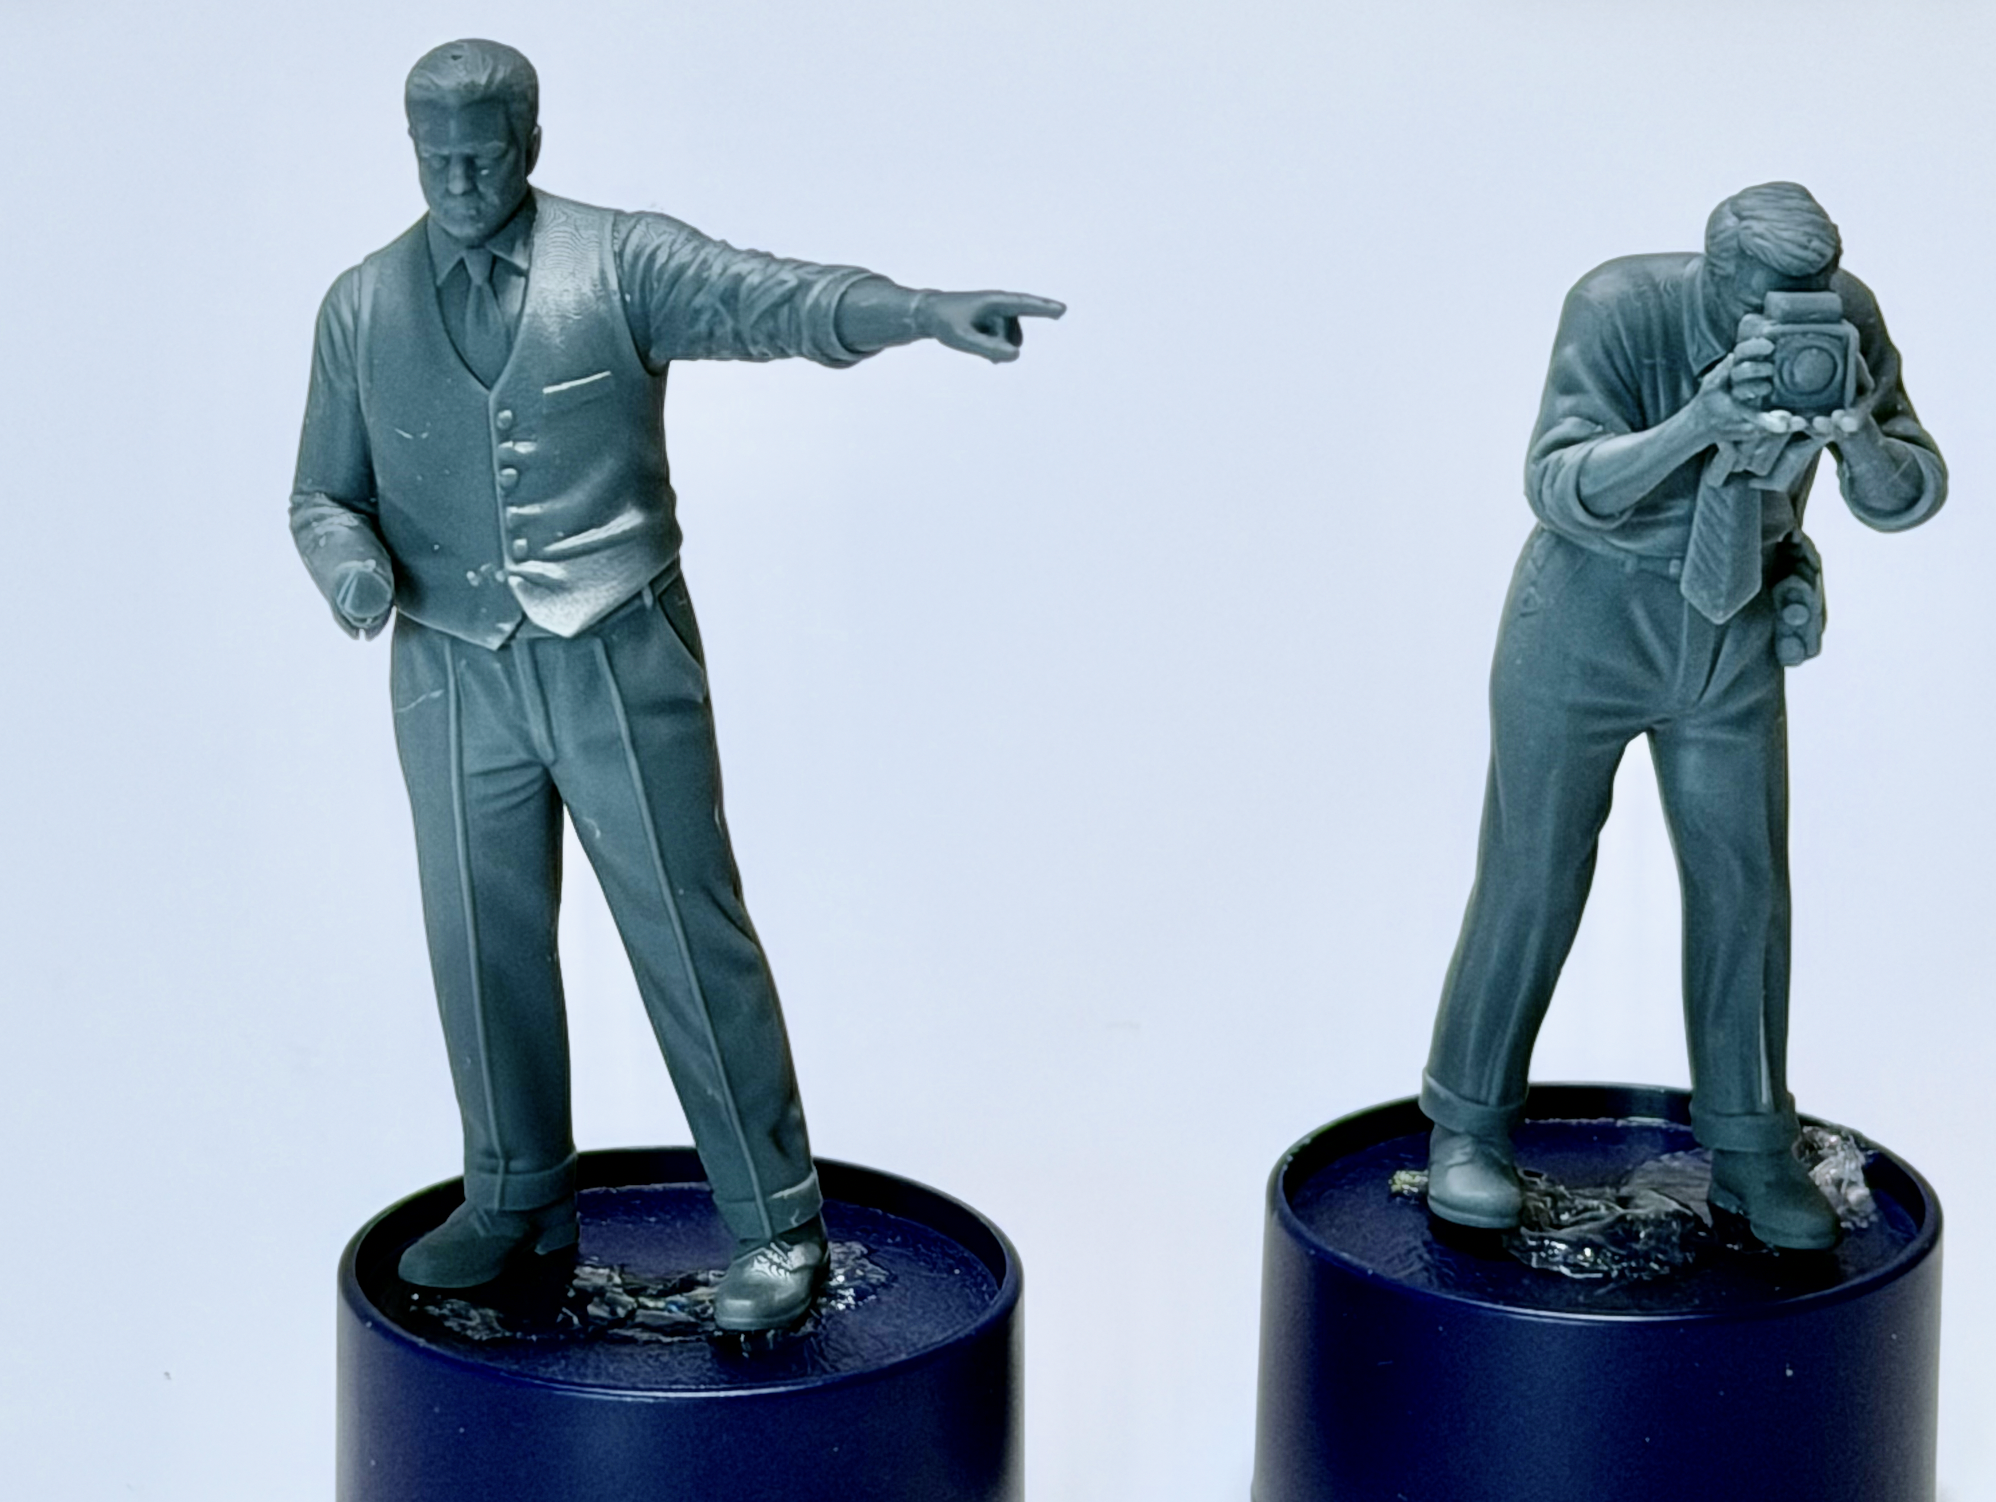
Final results
Here’s how the figures came out! (Well, two of the three anyway)
Where it works, where it doesn’t
The honest assessment is that the AI-to-3D workflow has a meaningful “iteration tax.” Simple figures in natural poses move through the pipeline quickly and reliably. Complex figures in constrained or unusual poses (e.g. a driver seated in a small vehicle) can take repeated attempts, and may still require manual intervention at the end. I’ve had to open photoshop to brush out stray artifacts or remove straps that should only be on one side of the both rather than both. But the good news is this doesn’t have to be precise.
Six months ago, this workflow produced essentially no usable results for us scale model nerds. . Today, it is producing figures actively used in real projects for me (and I’m sure others). In another six months or a year, the tools will likely be meaningfully better with fewer iterations needed, more faithful results on complex poses, better handling of fine details.
The goal isn’t perfection, it’s liberation. The real value isn’t that the figures are cheaper or faster than commercial alternatives. It’s that these figures wouldn’t exist any other way. The ability to translate a specific story idea into a physical object, without years of sculpting training, is genuinely new, and genuinely significant for the hobby.
Tips for Getting Started
Start simple. Pick a figure with a natural, upright pose and minimal requirements for precision. Save the complex seated or action poses for after you’ve learned how the tools behave.
Be flexible about accuracy. This workflow isn’t suited for historical recreations where every detail is fixed. Design for figures where close enough is good enough, and you can add finishing details yourself after printing.
Use your spares box. Rather than trying to get every detail perfect in the 3D model — the right canteen, the exact weapon, the specific equipment — print the figure cleanly and add injection-molded details from your parts collection afterward.
Think about hybrid approaches. You don’t have to use AI for the entire figure. Consider creating and printing a “dummy” figure in the right pose with the correct proportions, with hands, feet, and face already ready to go…then sculpting the clothing and adding accessories from the spares box without the hassle of building a wire armature and sculpting the body shape and proportions accurately.
Iterate without frustration. These tools are probabilistic. The same prompt might produce very different results on different runs. Refresh and try again. Good results often come after several attempts.
Find a Blender person. Even if you never want to learn Blender yourself, having access to someone who can make quick, targeted adjustments to your 3D files will significantly expand what’s possible.
The Real Point
The most important thing this workflow does isn’t save time or money. It removes a gatekeeping skill requirement that was previously preventing certain stories from being told at all.
For modelers who care deeply about narrative and who are drawn to the hobby by the stories that dioramas tell, the emotion they can evoke, the moments in time they can capture, the traditional sculpting path was always an obstacle. AI-assisted figure creation means you can spend your energy on the parts of the craft that matter most to you and get past the parts that don’t.
The tools are imperfect. The workflow requires patience and iteration. But the trajectory is pretty amazing.


Leave A Comment