
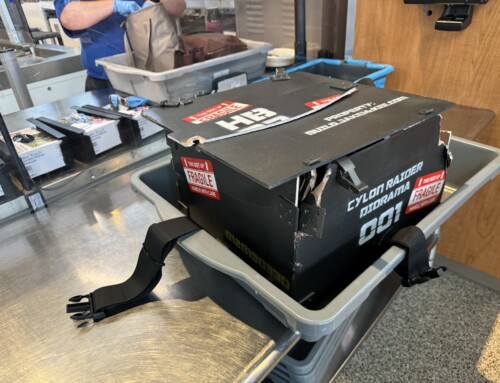
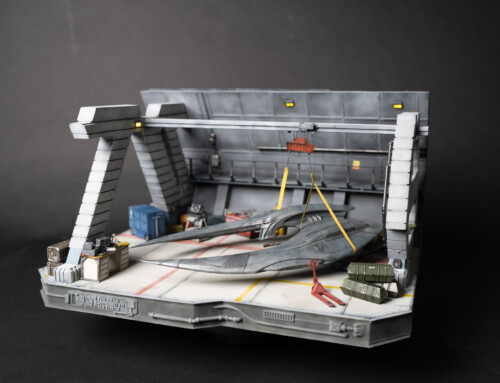
Congrats! You’ve bought your first 3D printer and you’re ready to get started. This post is the one I wish I’d have found when I started 3D printing more than a year ago.
Let me start this post with a basic sketch of what resin 3D printing is all about.
- Liquid resin is put into a “vat”
- The vat sits on top of the “screen”
- The screen is a UV light source that lights up certain pixels based on the instructions in your CTB file for the model you’re printing.
- You create this file with a “slicer” program. That program basically takes your model (the STL file) and “slices” it into hundreds, if not thousands of layers.
- The 3D printer looks at the CTB file, grabs layer 1, and lights up the screen pixels to match.
- The “build plate” is that flat metal surface that moves up and down on your printer.
- Every time the printer lights up the screen to match the current layer, it leaves the UV light on however long you’ve told it to keep it on when you sliced the model into the CTB (more on this later).
- When that time has gone by, the printer lifts up the build plate and then lowers it back down again, allow the build plate to have more liquid resin between the build plate and the screen.
- When the printer pulls the build plate away from the vat there may be a POP! sound. This is a good thing. Everything is sticking like it should. (Sometimes the model won’t stick to the build plate, creating a “print fail”)
- The vat is a plastic frame with a clear sheet on the bottom, allowing that UV light to pass through it to cure each layer of the print. (Did I mention that the liquid resin in the vat is UV light sensitive? Exposing the resin to UV light makes it hard. This is why you keep that cover over the model while it’s printing)
- Every once in a while you’ll need to replace the “FEP” (that clear plastic sheet). It’s super easy. Clean out the vat, remove the bolts on the bottom of the vat, remove the plate that locks the FEP in place, replace the film, put the plate back, punch some holes where the bolts go, tighten opposite corners/sides as you go, helping the FEP get tight enough to make a sound when you thunk it.
- If the FEP has any tears, blemishes, fatigued areas, CHANGE IT ASAP. If it break, you’ll spill liquid resin down the printer and likely ruin your screen. (Ask me how I know…)
Things I wish I’d have known
- This isn’t that scary! The first day I unpacked my printer, I was just flat out overwhelmed. I spent a few hours on YouTube watching “how to get started with 3D printing videos”, but it still felt scary. It’s really not.
- Waste a full bottle of resin getting to know the process. Just print some models, try different things.
- The orientation of your model in your slicer program has a direct and profound impact on how well the model prints. Try different orientations and see what happens. Often I’ll print several copies of the same model on one print to see which orientation and support mechanism ends up the best.
- There are a ton of sites to buy models to print. There are a ton of great Patreons where people are giving Patreons tons of models as part of their subscriptions.
- Print test models to dial in your settings. You can change the settings for your resin choice in the slicer program. Download a test model, print it, and then look up the instructions for what you should be seeing or why certain issues are happening. Each resin maker should have a test model, but you don’t have to use the test model from the resin maker. I typically print two or three different test models just for giggles while I’m testing. Here’s an example from Siraya Tech.
Things you should know
- The most dangerous part is resin. Don’t let it splash onto your or your equipment or your work area.
- Vent the fumes. Open a window install a vent through the exterior wall
- Wash your hands and wear proper protection (see “what to buy” below)
- Find a stable place to print. I bought a small tool cabinet with a wooden top from Home Depot and it’s the perfect size for the printer and the wash & cure machine. Since it’s a separate table, I don’t shake it when I work on other projects while the printing is running.
- Oh yeah, printing might take a while. Depending on the model, the prints can run 7 hours or more. All normal.
- While the printing process “cures” the resin layer by layer, you still need to do a final full cure of the entire model. Play with the curing time…. too long and it’s brittle. Too short and it’s gummy and hard to paint.
- Shake shake shake that resin. Like paint, if it sits a while, it’ll separate. Shake it up before you pour it in. And if there’s already resin in the vat and you’re just adding more resin, stir it up (careful not to splash) or pour it out of the vat and back into the bottle, shake, repour into the vat.
- When you’re done printing, you can put the extra resin back into the resin bottle. Just make sure to pour it through a fine grade paint strainer to pull out any bits of dried resin.
What to buy
- Printer (duh)
- Wash and cure station – this helps you clean the excess resin off your model when it’s down printing then allows you to convert over and cure the model (you can get a ton of these from most every company… just check the reviews)
- IPA – 90% or higher. This is not the Walgreens stuff… you need it to be medical grade full strength! And be prepared to go through a decent amount
- Lab gloves – SO SO much easier to get off and on then the disposable gloves, and vastly less waste.
- Safety goggles – wear them. Every time. Seriously.
- Cafeteria trays – These are nice to use to move parts around while they dry
- Shop towels – These blue shop towels are one of the best tools in my hobby room, and for sure the best to use in the printing process.
- Trash can – put one right by your station so you can dump the paper towels, trash supports, etc. without dripping resin and IPA across the room
- Paper paint strainers
- Funnel (to hold the strainers)
- Funnel stand
- Spray bottle – I use this filled with IPA to do more “spot” cleaning and washing
- Spatula – for stirring resin in the vat
- 2+ FEP replacement sheets
- Rubber mat – put under printer + wash and cure to capture any liquid resin drips
- UV Flashlight – I use this when there are spots on the model that I can’t cure with the curing station. Example: Models with holes to make them hollow… I’ll stick the light inside to make sure it’s all cured.
- Cheap torch-style lighter
- GodHand nippers – these are THE best for removing supports. I’ve linked the cheaper version, but I actually use the more expensive version.
My Workflow
- Find the STL file online from any source
- Import the STL (or multiple STLs) into the slicer (there are really two big ones: Chitubox & Lychee)
- Layout the STL models on the build plate, rotate them the best way possible (typically at a 45 degree angle)
- Add supports – I typically start with the automated support additions and then tweak to make it work the best
- Slice the file and save the CTB onto the printer’s USB stick
- Plug the USB stick into the printer
- Shake the resin bottle, fill up the vat
- Run a torch lighter across the surface of the resin to quickly pop the bubbles
- Put the cover on and start the print!
- Open a window, start the vent fan, etc.
- Setup a cafeteria tray with a couple shop towels laid out. Tear off another one to have handy
- Once the print is done, remove the build plate and use a plastic scraper to pull as much of the liquid resin off the build plate and let it fall back into the vat
- Over the cafe tray, use a metal scraper to pop the model off. Put the printed model(s) into the wash bin basket and put then use the wash and cure station to wash the parts.
- Take the parts out of the wash bin and leave them to dry on top of the shop towels. Let ALL of the IPA evaporate before proceeding
- Remove the supports by hand snapping them off. This usually works best most of the time. There are some parts that I leave the supports on because they’re too flexible or fragile to do before curing. Test this – the printer, resin, conditions, models used all have an impact on this. (And hey, if you mess it up, especially in the beginning, just print it again!)
- Move the parts to the wash and cure station and cure the parts. You’ll have to play with the right curing time. Too much curing makes the parts really brittle. As with so many things, the resin you use, the model itself and how you designed the supports… it all matters, so experiment! Remember: your first bottle of resin is just testing waste!
I think that’s about it. I’ll continue to update this post as I learn more, remember more, and want to share more.

Leave A Comment